Replacing a MAIN BOARD
Step 1:
Pull the board drawer out safely, ensuring wires are not pulled if there is resistance or hooked on fragile parts.
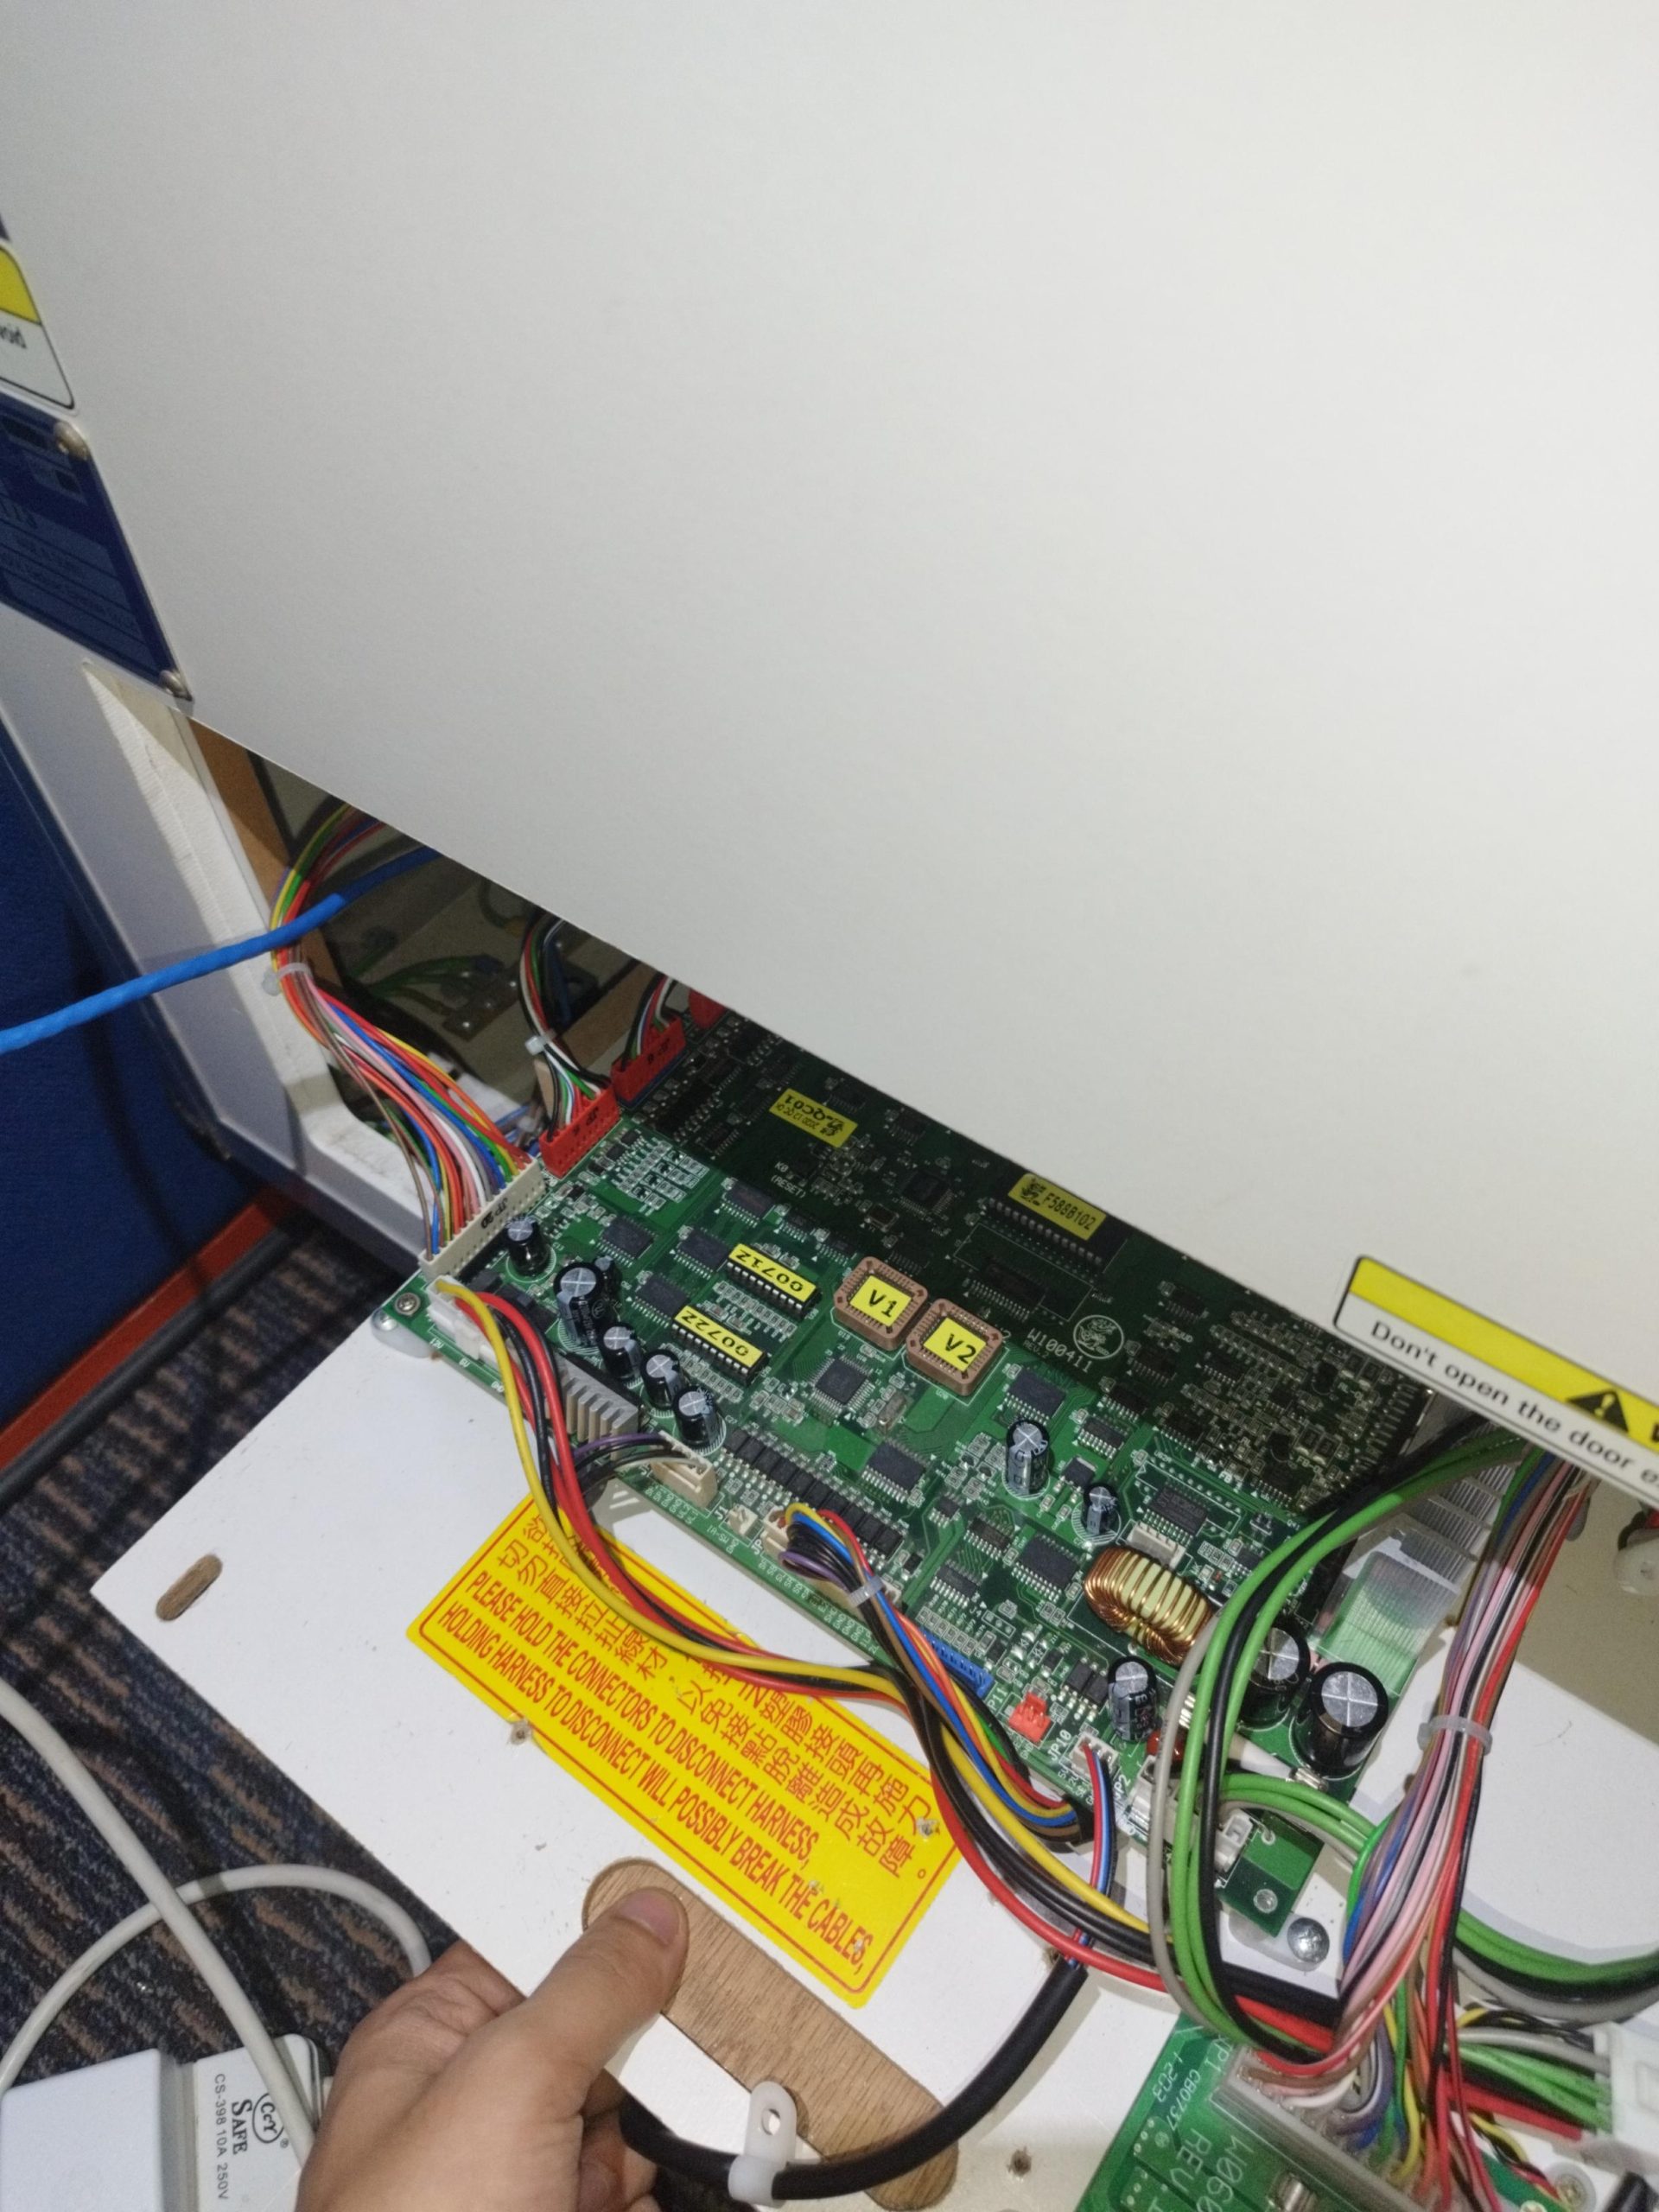
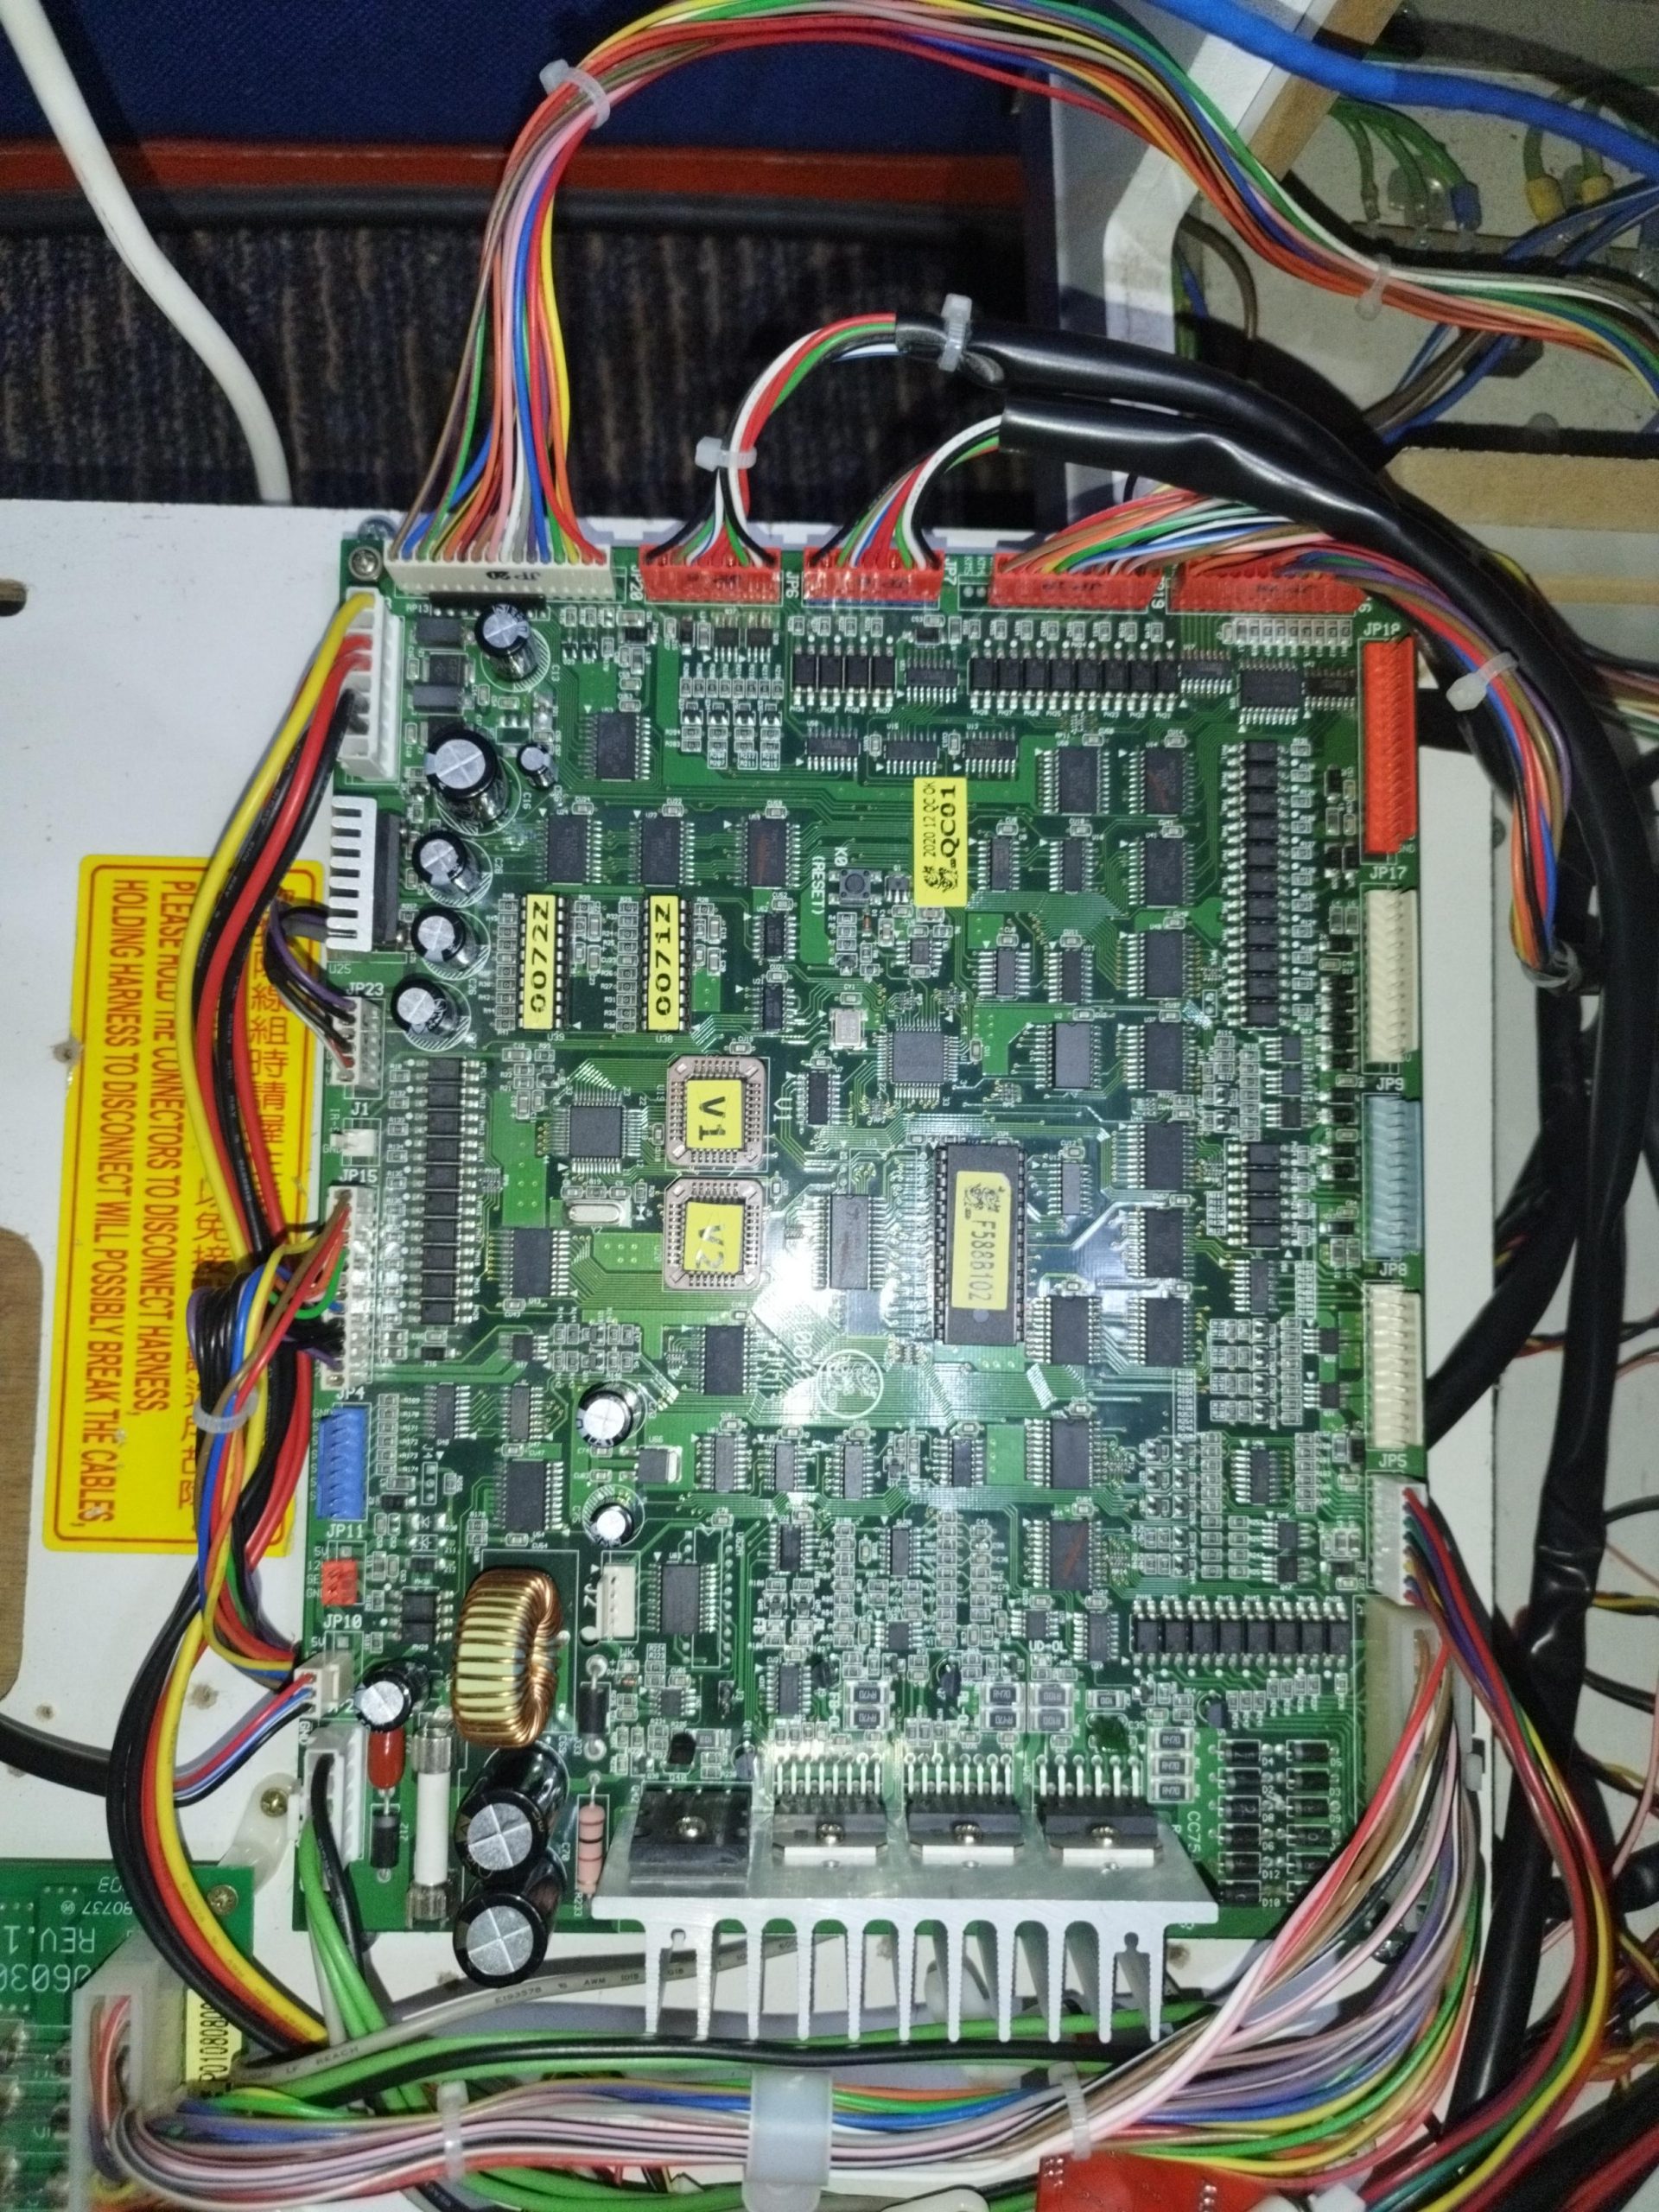
Step 2:
Take a clear photo before replacement so all connections are clear for you to see where the new board connections are to be put in correctly.
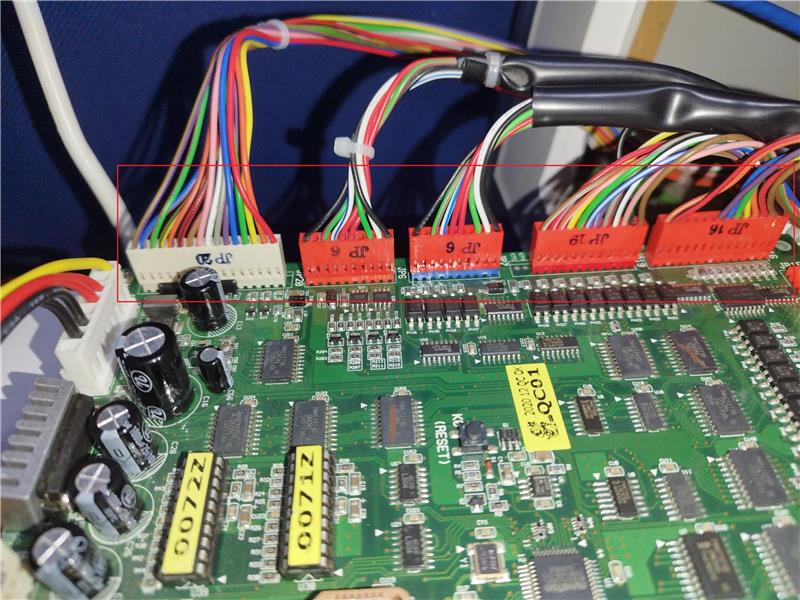
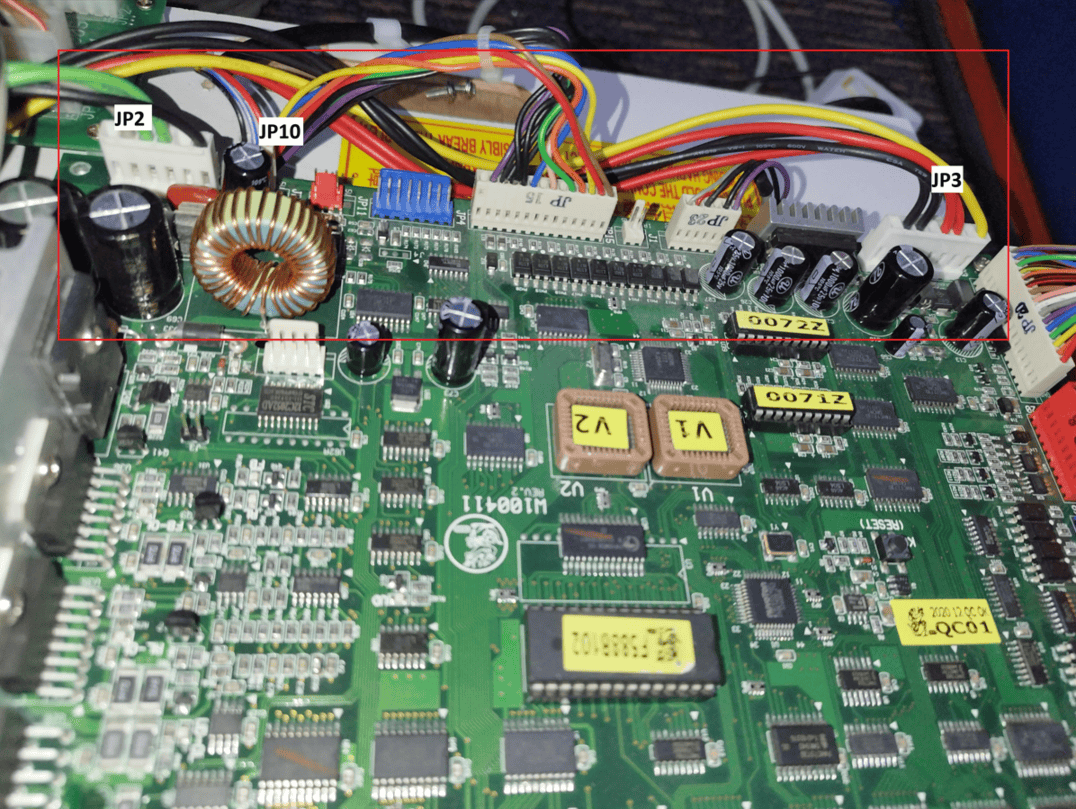
Step 3:
Checking JP numbers on the board and on the corresponding plugs.
Step 4:
Matching the feet of the new board to the old board to easily screw back in, ensuring the board is always secure and screwed into place before connection put back.

Step 5:
Check all connections are correct using the photo and checking with tech support before turning back on.
Step 6:
Test all payment methods and functions, remember that settings may have to be reset as well as payment settings, please contact IT to check everything with you.