Items needed:
- Standard Phillips head screwdriver
- Narrow flat head screwdriver
- Large Phillips head screwdriver
- Cable ties
- Socket Set
The purpose of this procedure is to try and catch issues that might cause the machine to fail before they happen, which both reduces revenue loss, but is also generally much easier to resolve. For example, replacing a broken caterpillar clip is significantly easier than repairing a snapped wire, especially as you will need to find the broken wire first!
TOP OF MACHINE
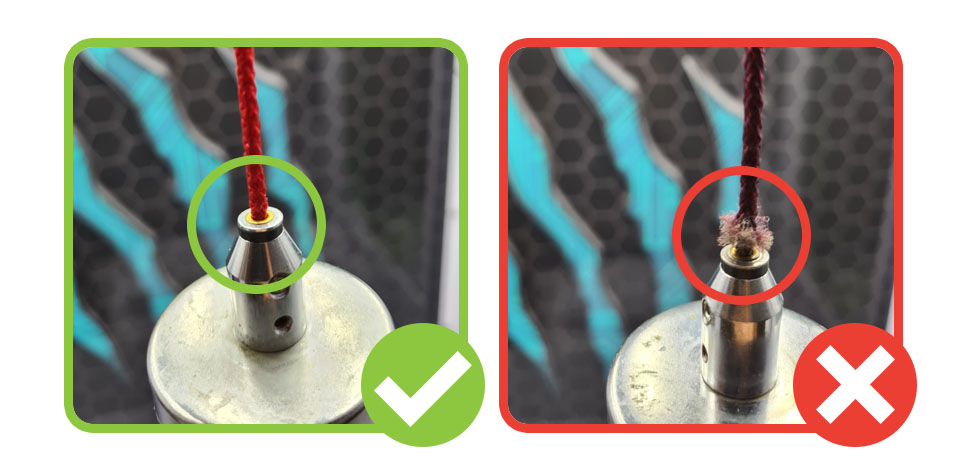
Step 1: Check the red cord
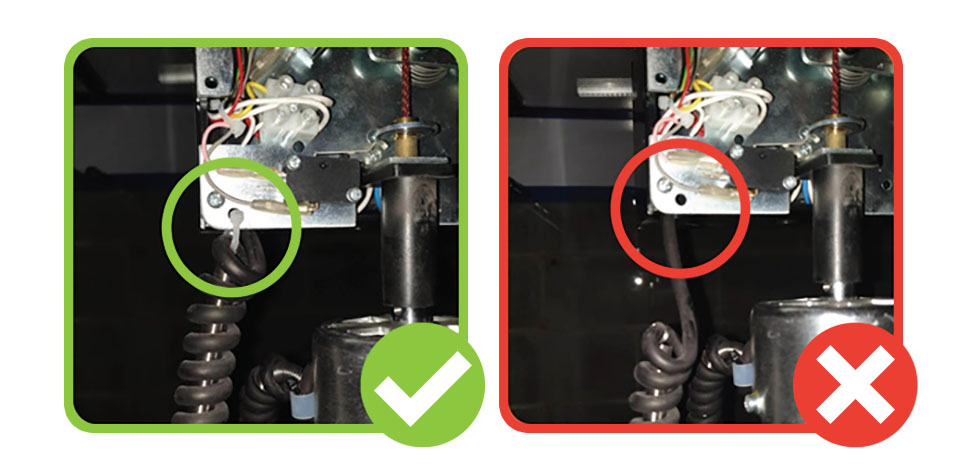
Visually inspect the red cord at the point it enters the bolt. This is a high-wear zone, and any damage here means the cord needs to be replaced.
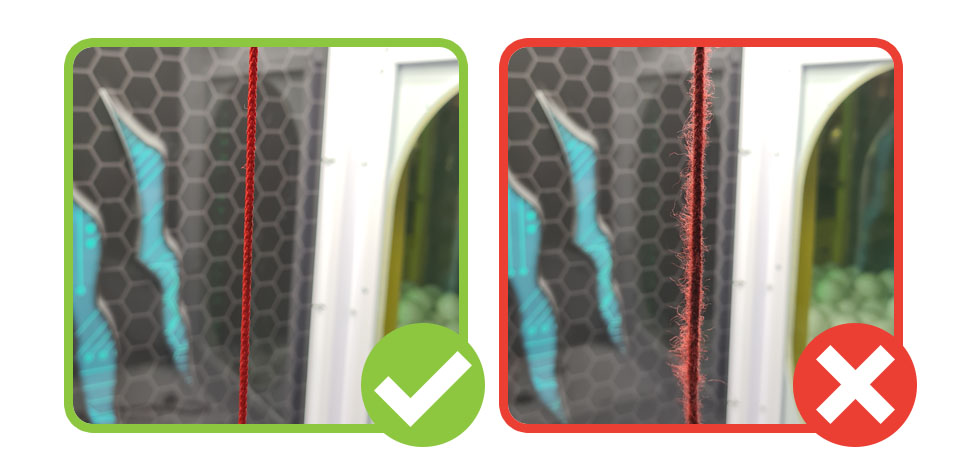
Next, start a test game and drop the claw to the level of the filler balls, and while the claw is lowered turn the machine off. Inspect this length of red cord for any fraying, and replace if frayed.
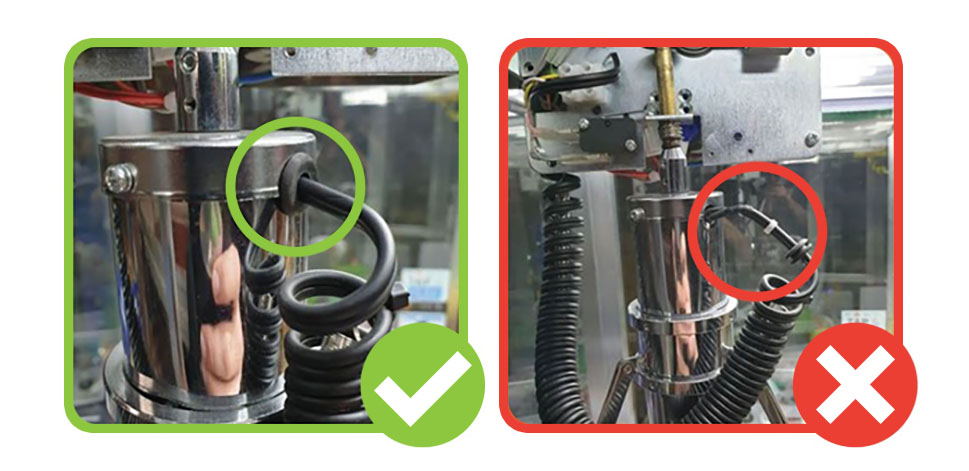
Step 2: Check the coil
Check that the rubber grommet is in place and that there is no damage to the wire in this area, if there is replace the coil as it will otherwise fail and put the machine out of order.
For Maxi Claw machines make sure that the P-clip is in place with the wire running through it and the spring secured by the screw. The wire should run through the P-clip from bottom to top as this is the direction of pull when the claw drops.
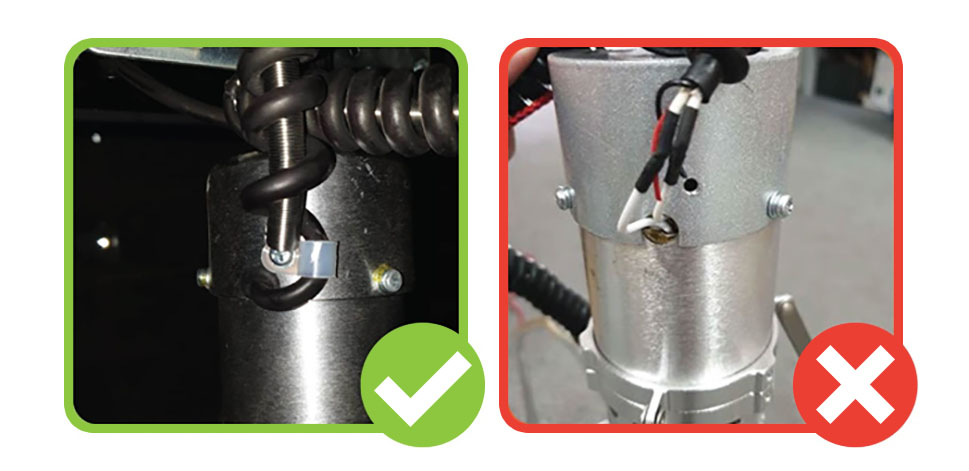
Check that there is a coil spring running up the length of the wire, and that this is cable tied near the grommet at the claw end (or by the P-clip screw on Maxi Claw machines), and that both the spring and wire are cable tied to the hole in the gantry head at the other end.
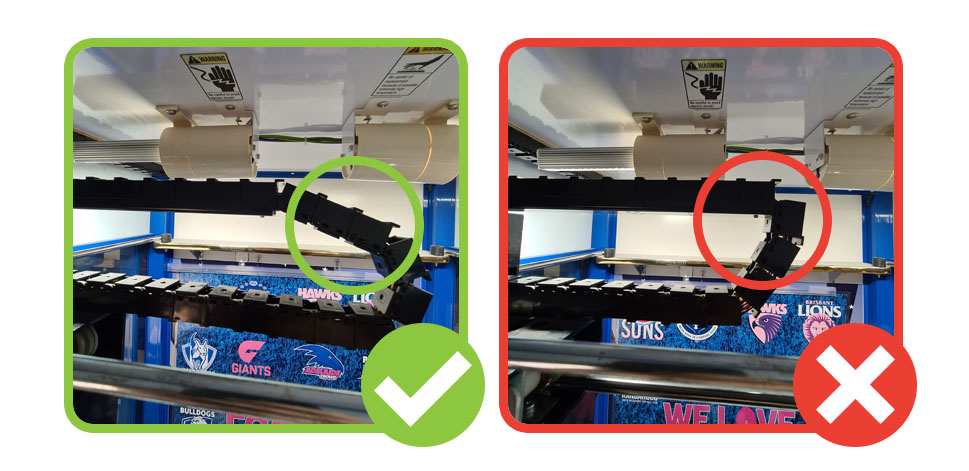
Step 3: Check the caterpillar clips
Check that both sets of caterpillar clips (front-to-back, and left-to-right) are connected, in good condition, and that no wires are poking out. Replace any damaged clips.
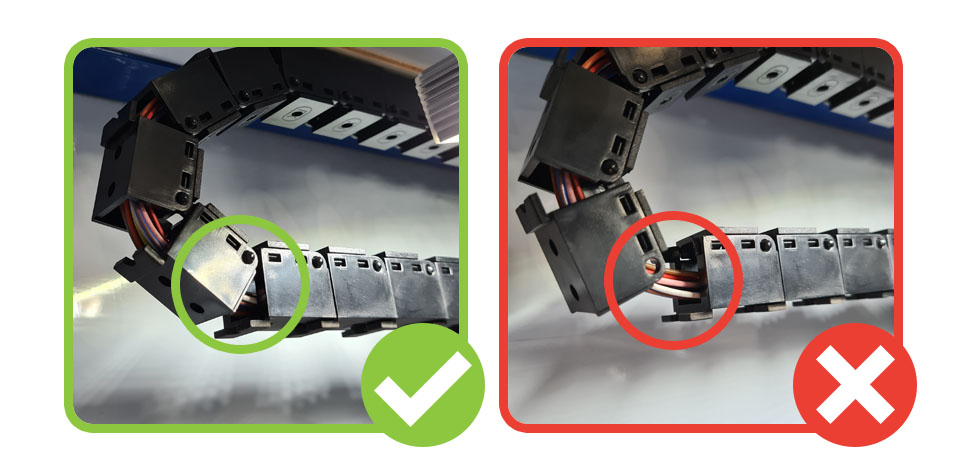
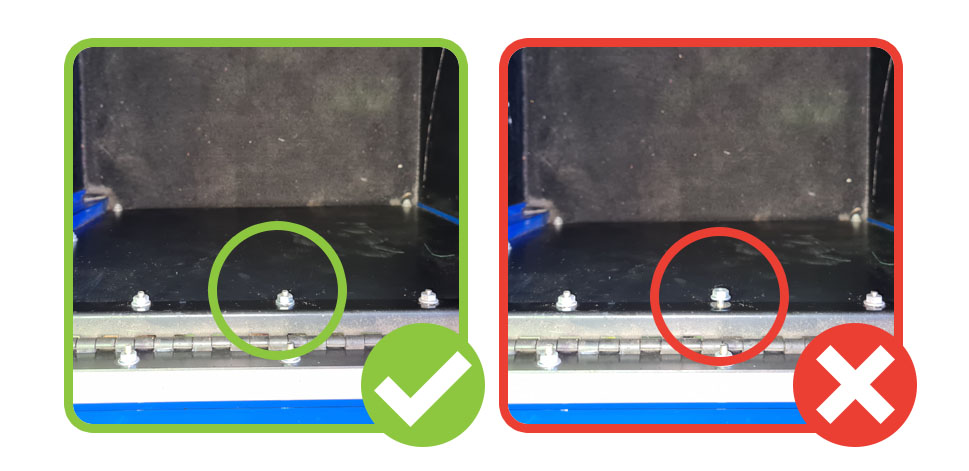
Move the gantry all the way backwards and all the way left, and make sure that the caterpillar clips are not pulling tightly. If they are, you may need to add an extra clip to add some slack so that the wires are not put under strain.
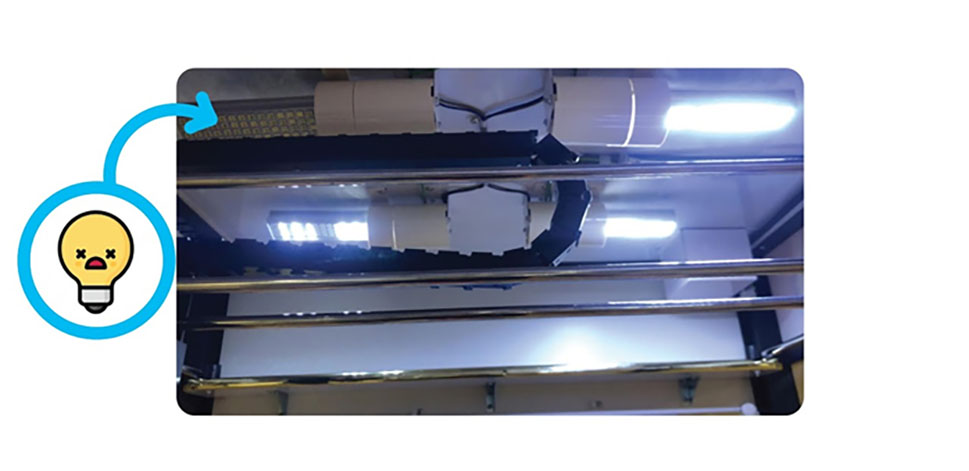
Step 4: Check the light bulbs
A well-lit machine is both more noticeable and more appealing. Check that all light bulbs are working and not flickering and replace any that are. If any light fittings either do not work or will not accept a bulb, contact Tech Support for assistance.
N.B. SWITCH OFF MACHINE BEFORE REPLACING PARTS, ESPECIALLY LIGHT BULBS
Do not force or twist light bulbs – gently turn them while keeping the thread lined up, otherwise you are likely to damage the fitting, create a short, and blow fuses (both in the machine, and in the centre).
INSIDE CONSOLE/MACHINE
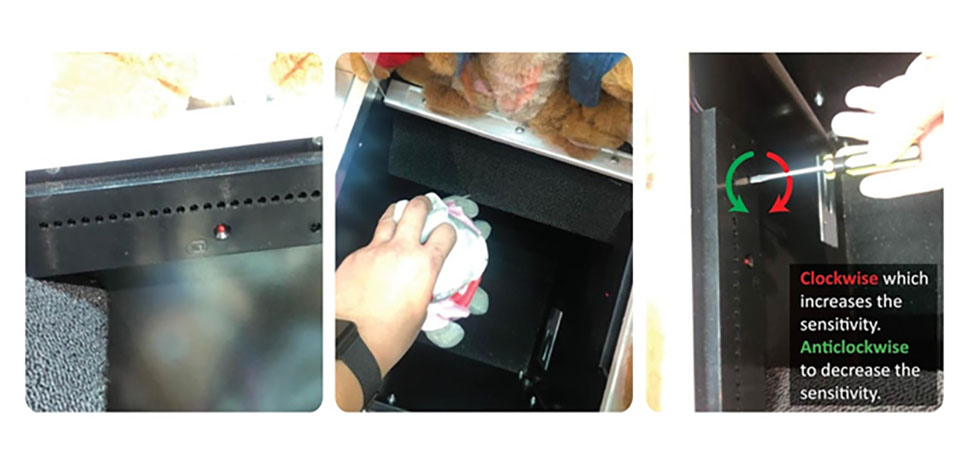
Step 1: Check win sensors
Hold a toy inside the prize chute and away from the win sensor, checking that the red LED illuminates. If it does not, adjust the sensitivity with a screwdriver until the LED is unlit with no toy and lit when you block its path with a toy.
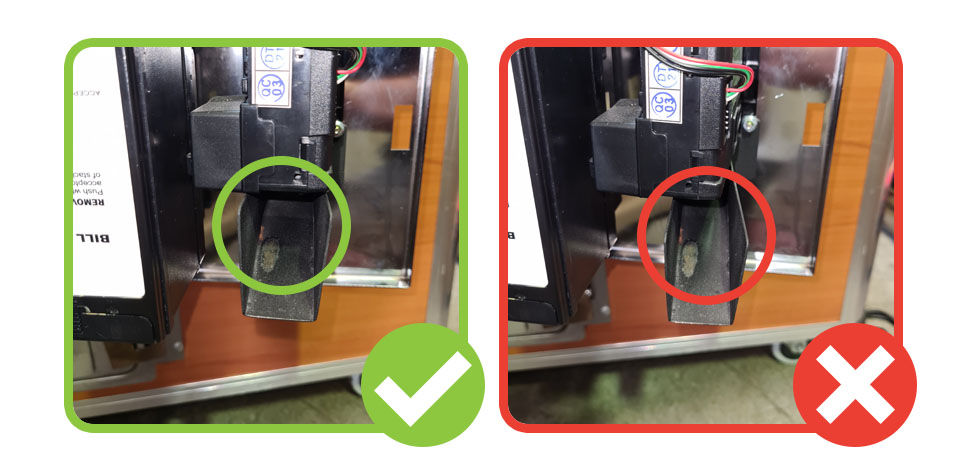
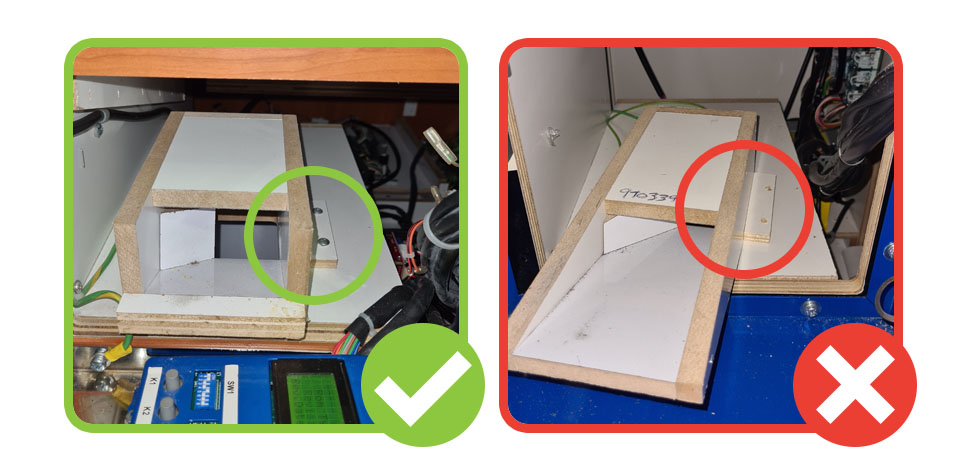
Step 2: Check coin chute
Coin chutes take many small knocks from coins and can work loose over time. For metal chutes below coin mechs ensure that they are tightly secured to the console door and angled straight. Tighten/adjust if necessary.
For the wooden chute ensure that they are properly secured and cannot move. If they are not secure, they will need to be secured with screws.
Step 3: Check prize door
Prize doors are held on by bolts on both sides of a bracket, and these bolts work loose over time. Check that these are tight and tighten any that have worked loose. Spare bolts can be ordered from Tech Support.
Step 4: Check prize door locks
Prize door locks help keep machines secure and clean by preventing access unless the machine is in use. Check that they are working correctly by inserting money, playing a test game, and forcing a win.
If they open as expected then just give them a clean to prevent build up of dirt. If they do not open as expected contact Tech Support.
BACK OF MACHINE
N.B. TURN MACHINE OFF BEFORE TOUCHING THESE PARTS FOR SAFETY
Step 1: Check the PCB
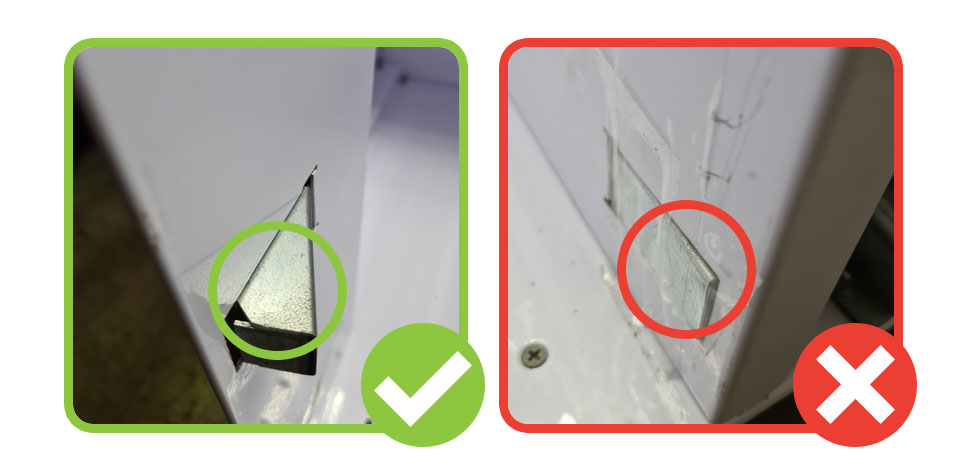
Check that the PCB is properly secured to the wooden board at all four corners and replace any damaged plastic feet
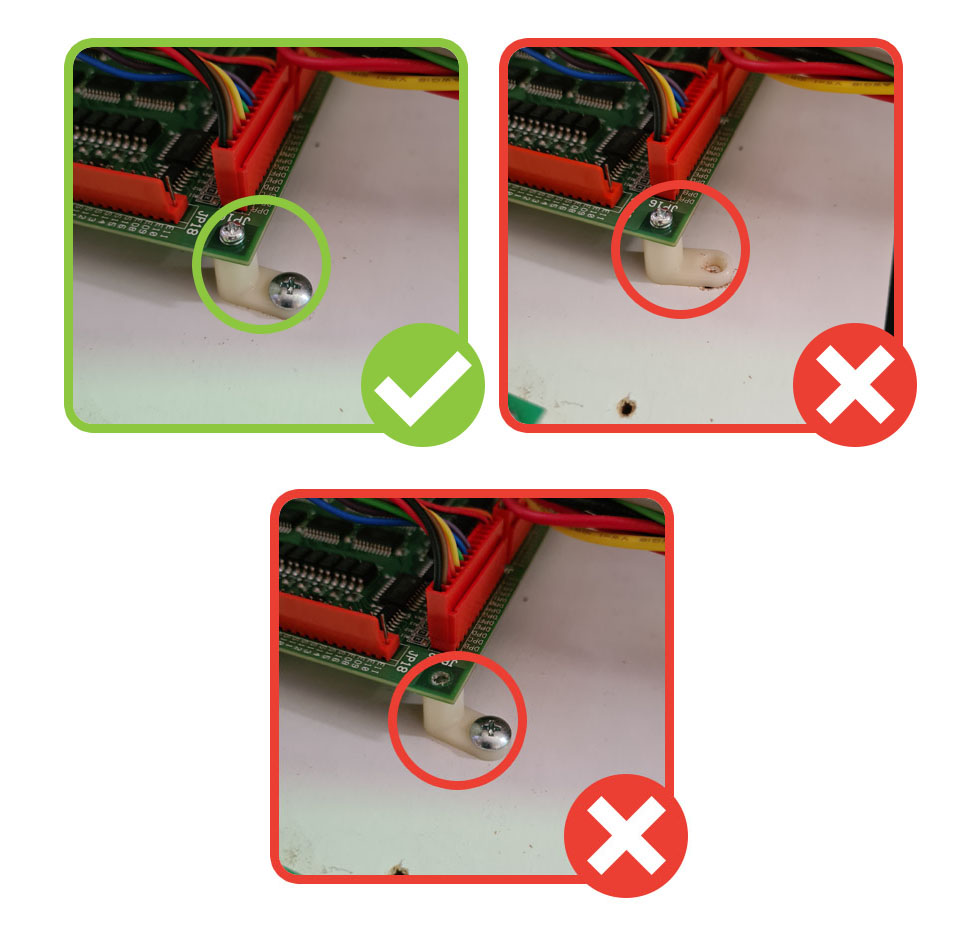
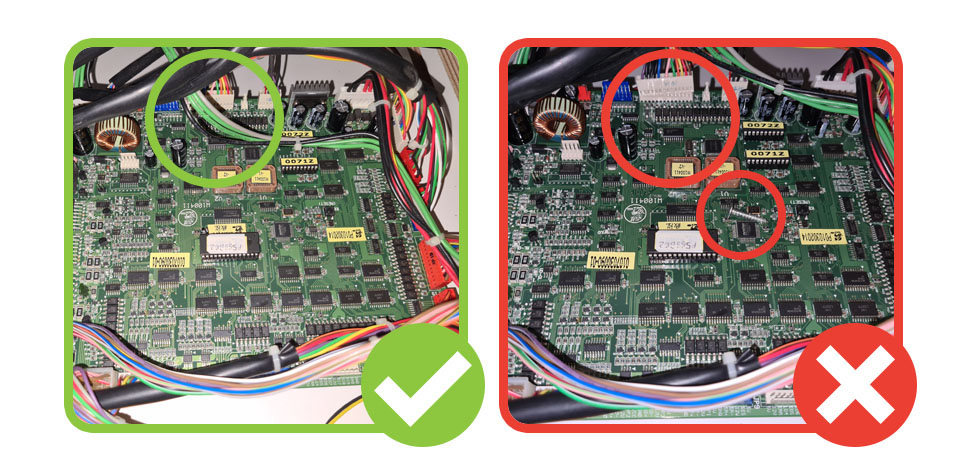
Check that there is no dirt/debris on the PCB that may cause damage or a short-circuit, and that there are no wires loosely plugged in that may come out.
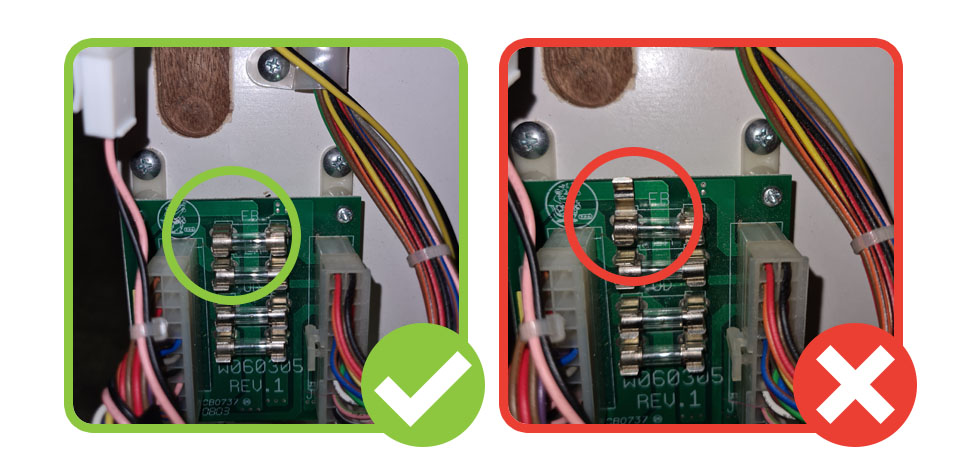
Step 2: Check the fuse board
Check that the fuse board is properly secured to the wooden board at all four corners. Check that there is no dirt/debris on the fuse board that may cause damage or a short-circuit, and that there are no wires loosely plugged in that may come out. Check that the fuses and fuse housings are in good condition, and if there is any damage replace the fuse board.
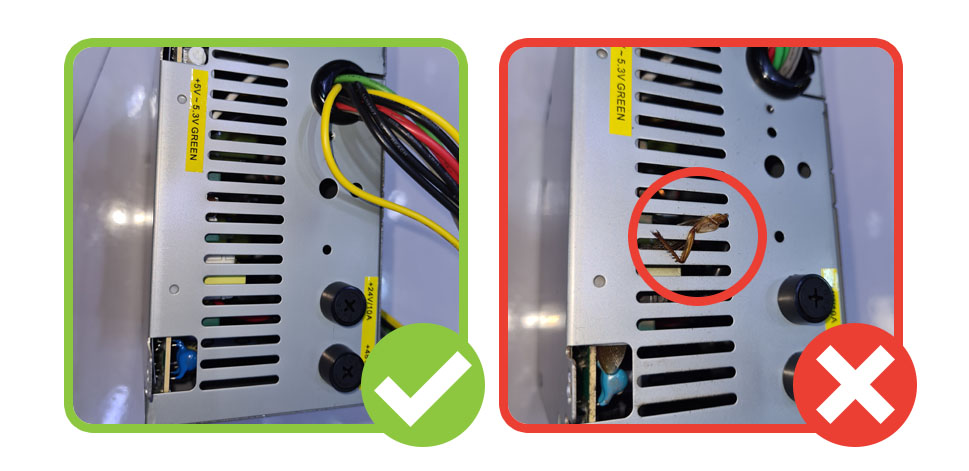
Step 3: Check the power supply
Check that the power supply is properly secured, plugged in, and that the earth wire is connected
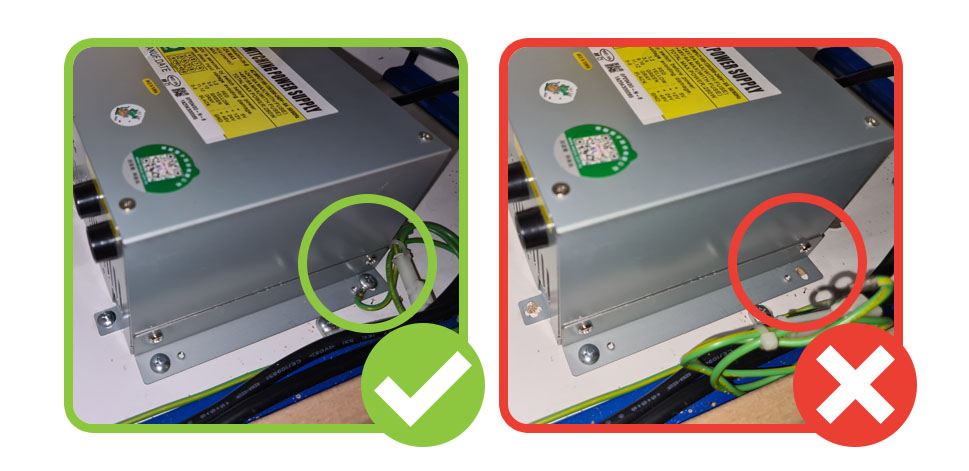
Visually inspect the power supply to ensure that there’s no dust/dirt/dead bugs inside. If you do notice that the power supply is very dirty or full of bugs this should be cleaned out or replaced.
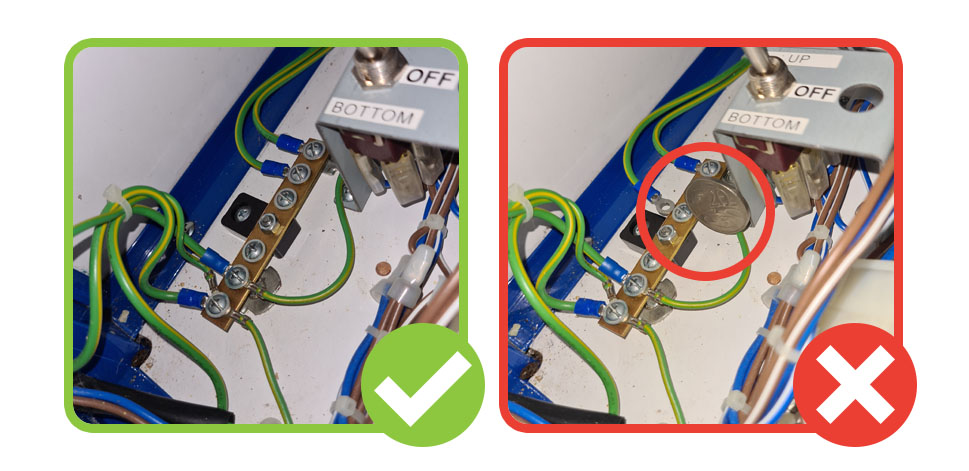
Step 4: Check the earth bridge
Check that all the wires on the earth bridge are secure and that there is no dirt/debris/dead bugs on or near the earth bridge, as this can be a fire risk. Clean if necessary.
N.B. TURN MACHINE OFF BEFORE TOUCHING THESE PARTS FOR SAFETY
CONSOLE & COIN BOX BOLTS
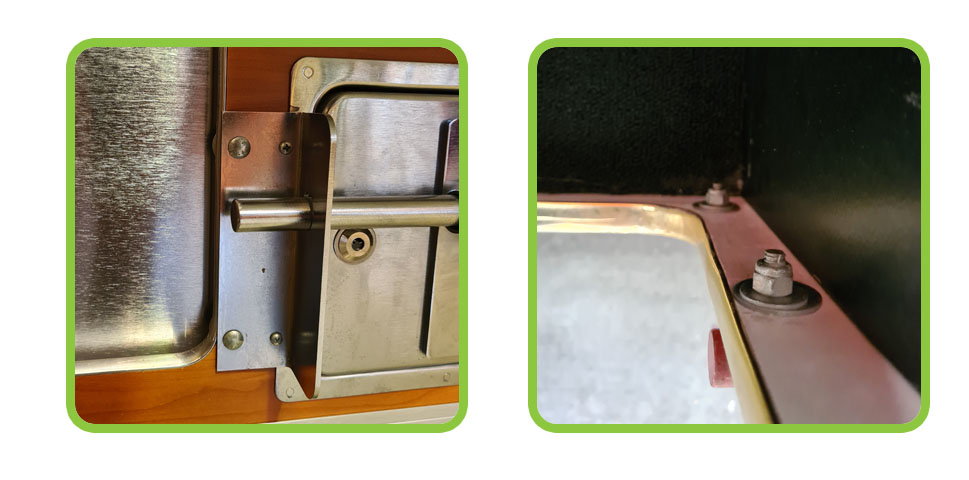
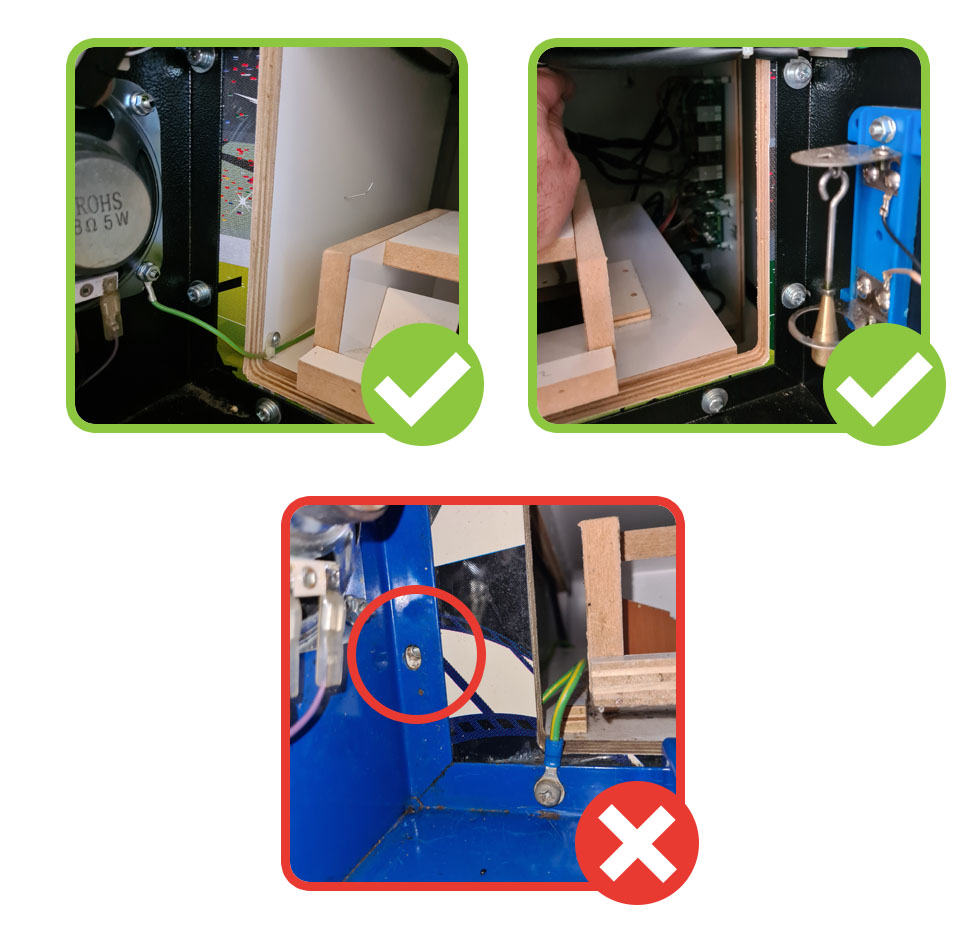
Step 1: Check the console bolts
Every console should have six bolts holding it in place as per the pictures below. Check that none of these are loose or missing. If they are loose, tighten them with a large Philips head screwdriver. If they are missing spare bolts these can be ordered from Tech Support.
Step 2: Check the coin box bolts
The bar across the coin box helps keep the machine secure, and we need to check that the bolts holding this in place are all there and done up tightly. There are two accessible from the prize chute, two from the inside of the coin box door, and two from inside the machine itself, behind the console (these can be accessed by reaching in and down through the gap in the back of the console).
Check that these are tight, tighten if necessary, and for any missing bolts these can be ordered from Tech Support.