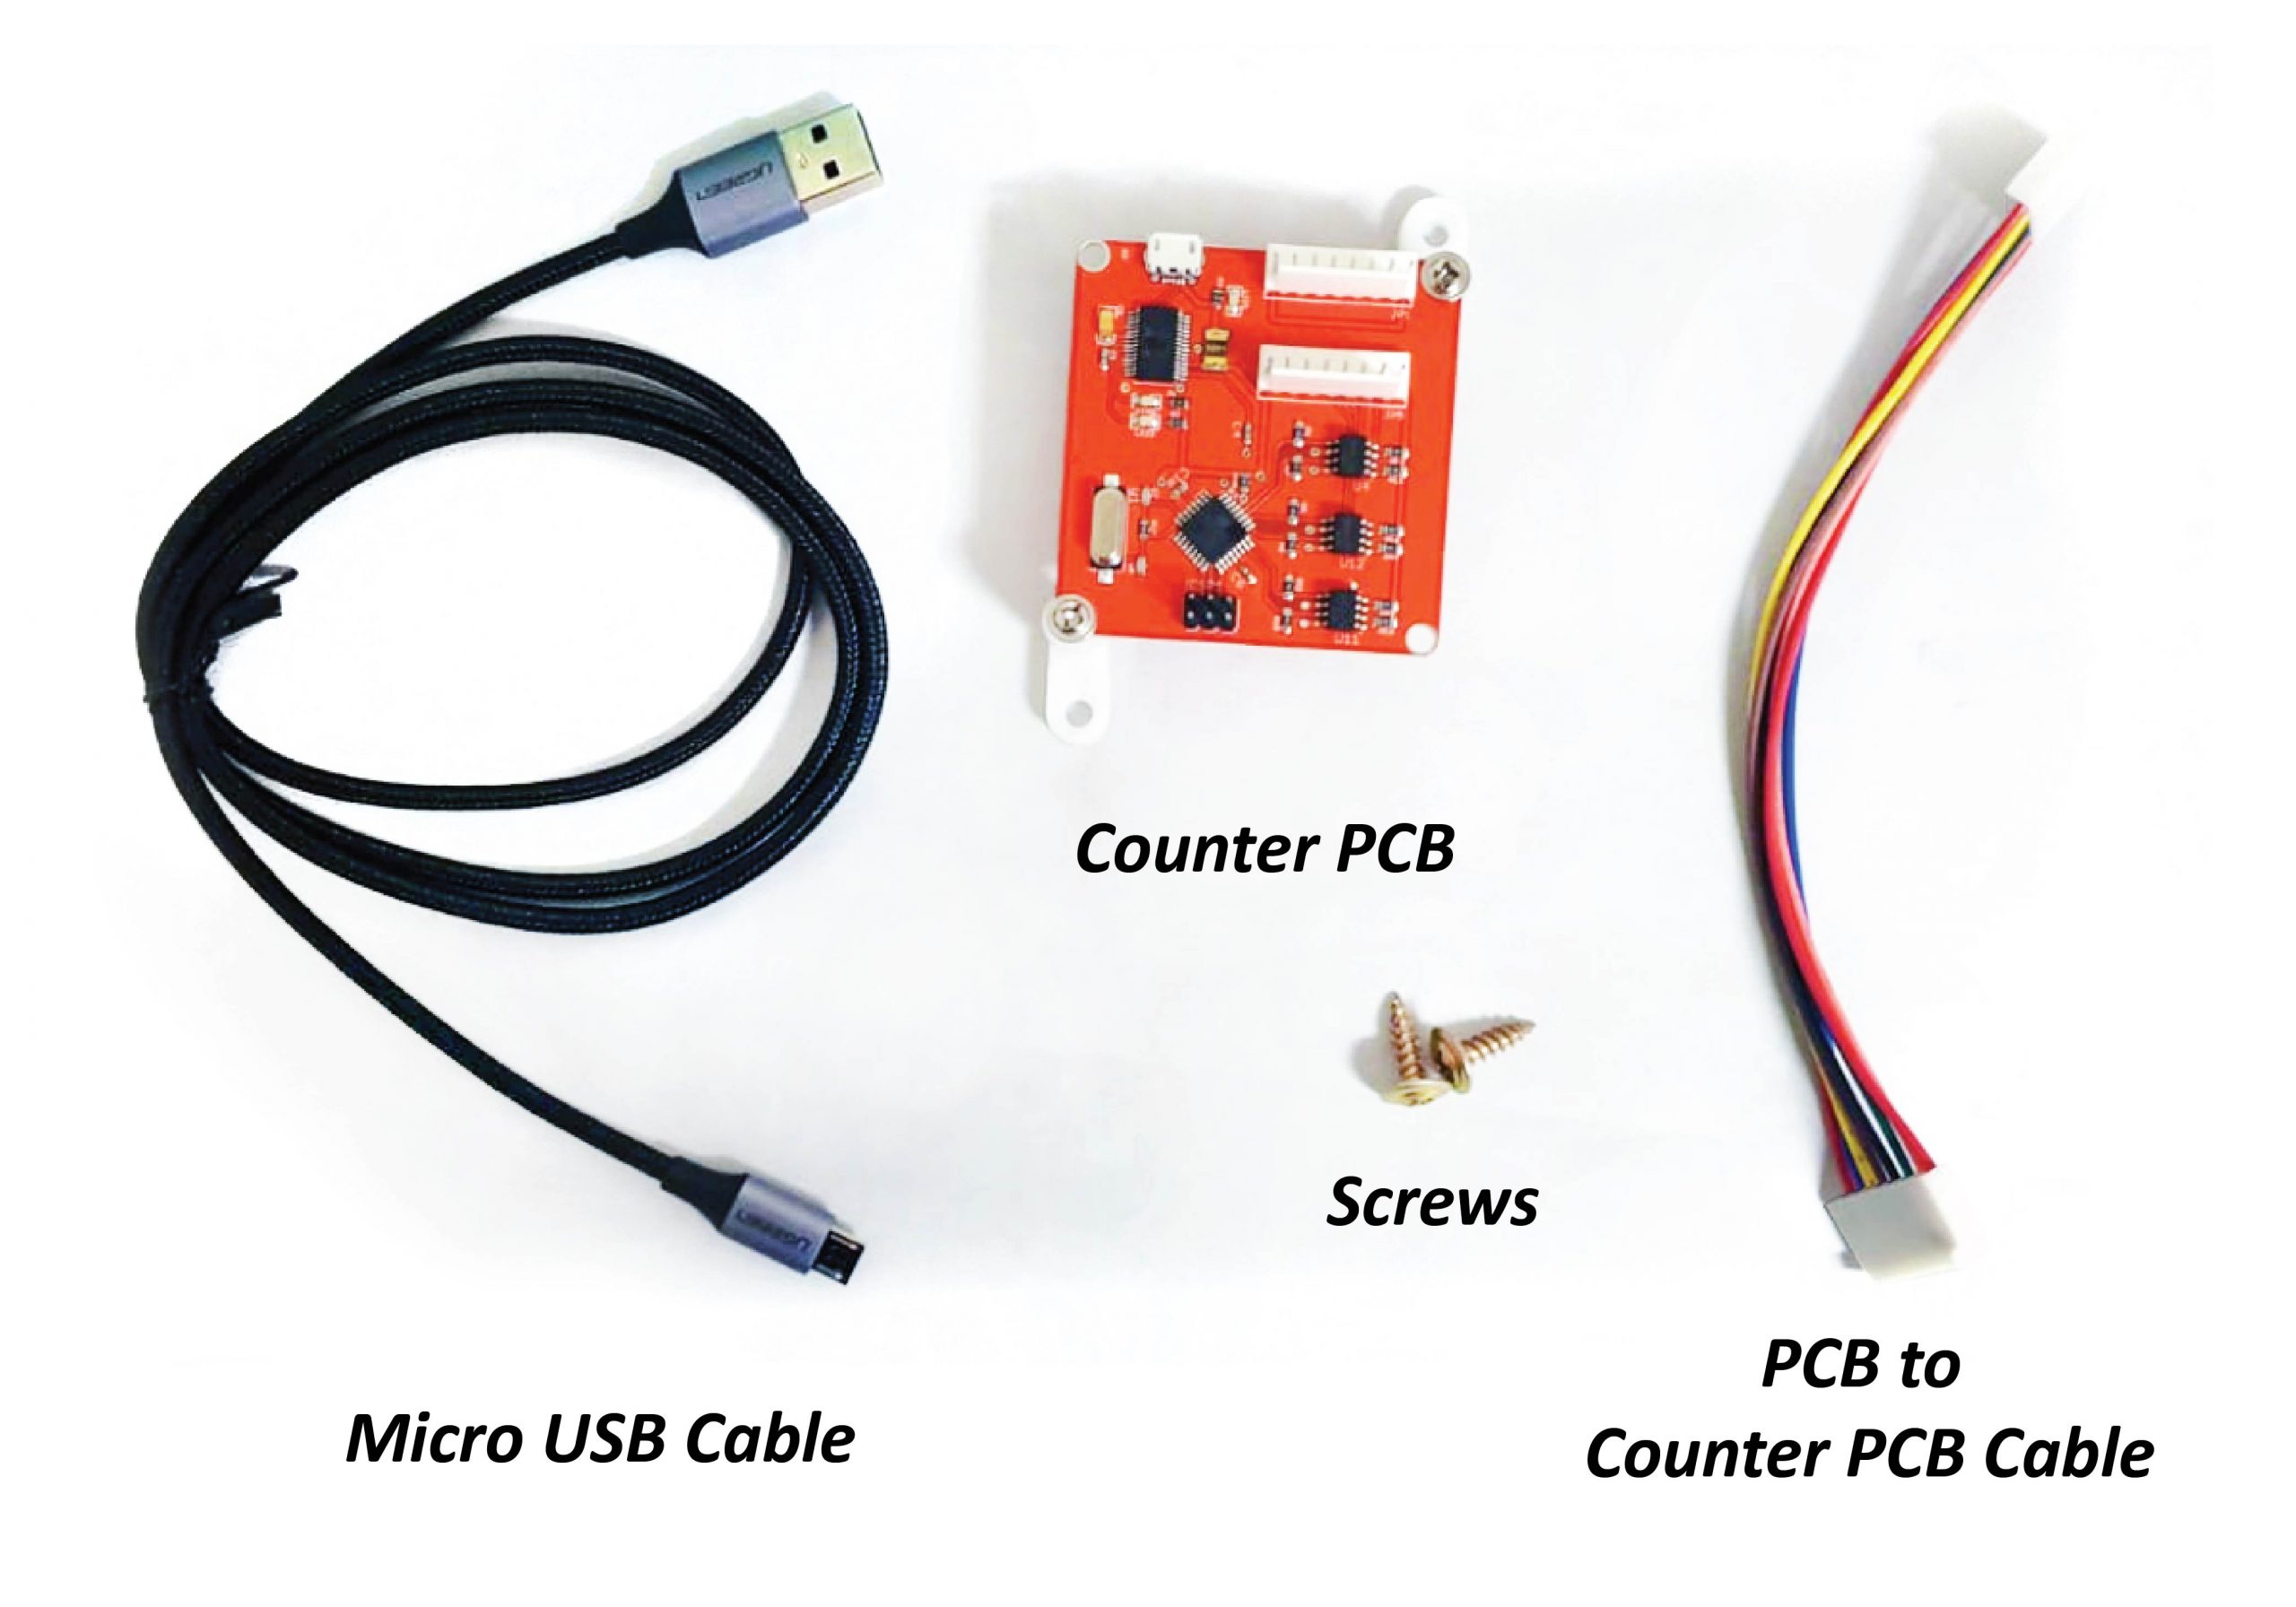
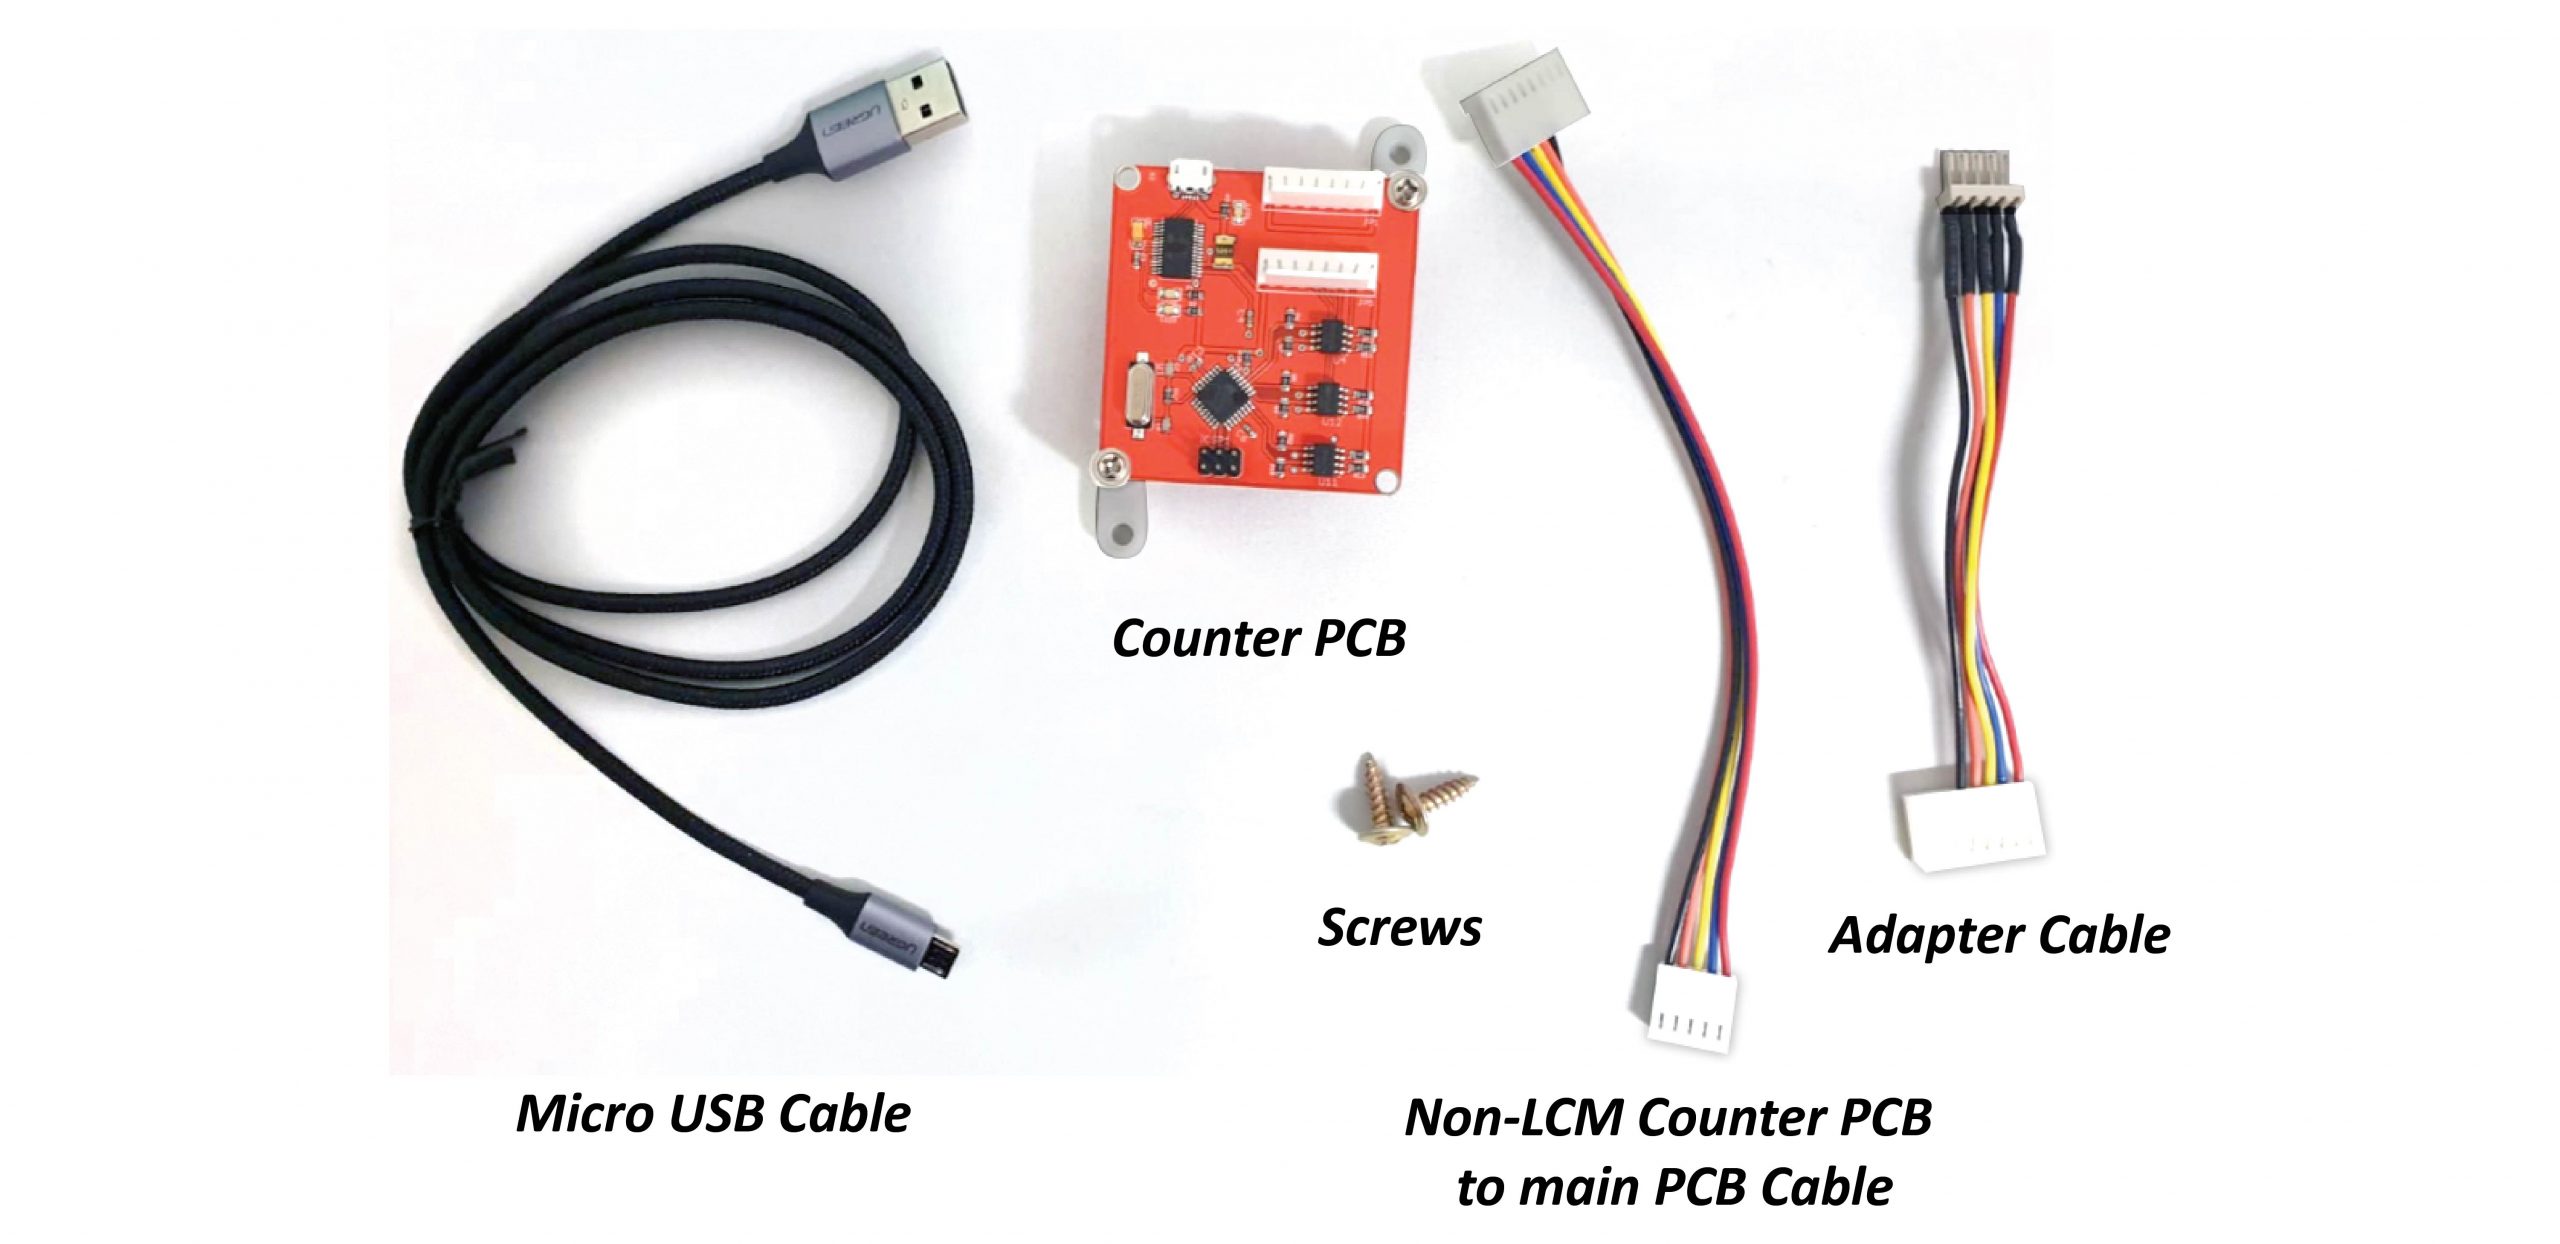
Parts Needed
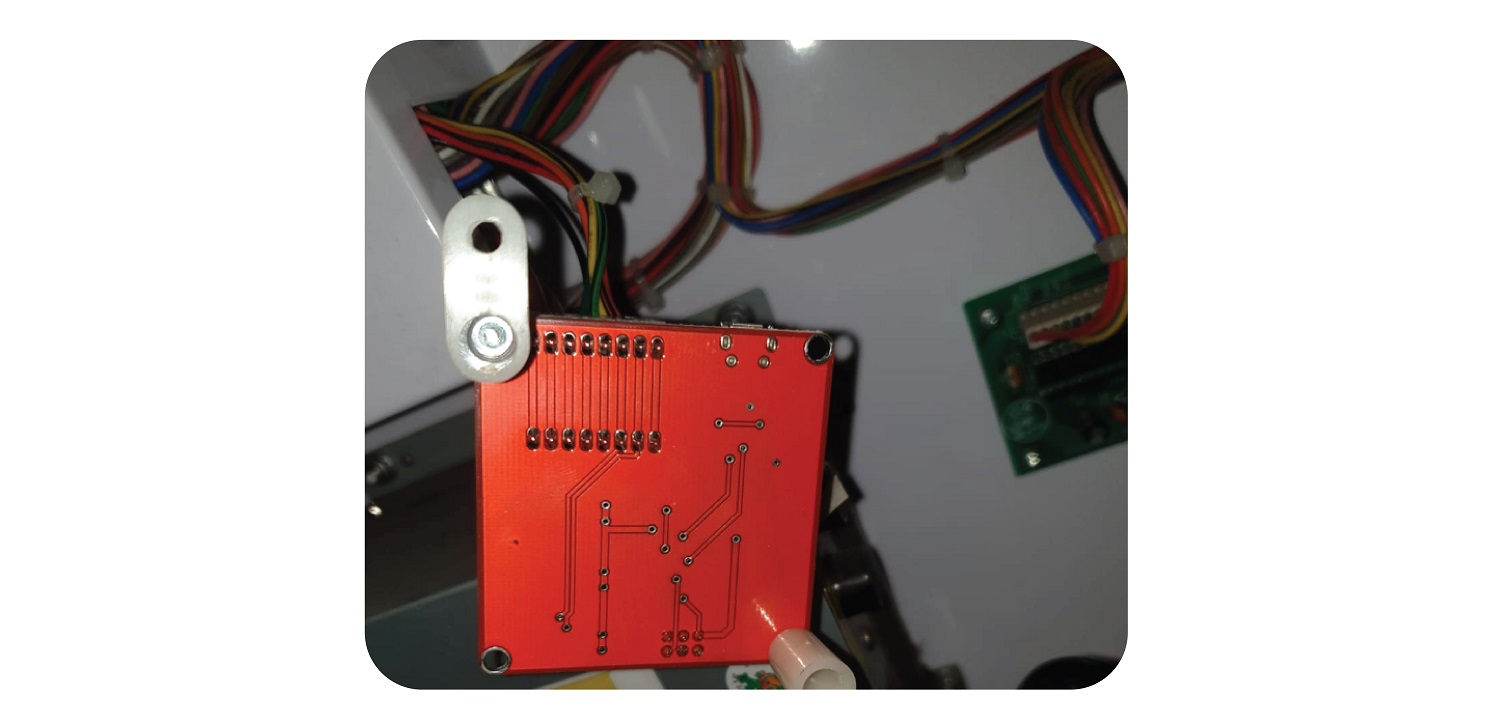
- 1 x Counter PCB
- 1 x Micro USB cable
- 1 x Pcb to Counter PCB Cable
- 2 x Screws
Step 1:
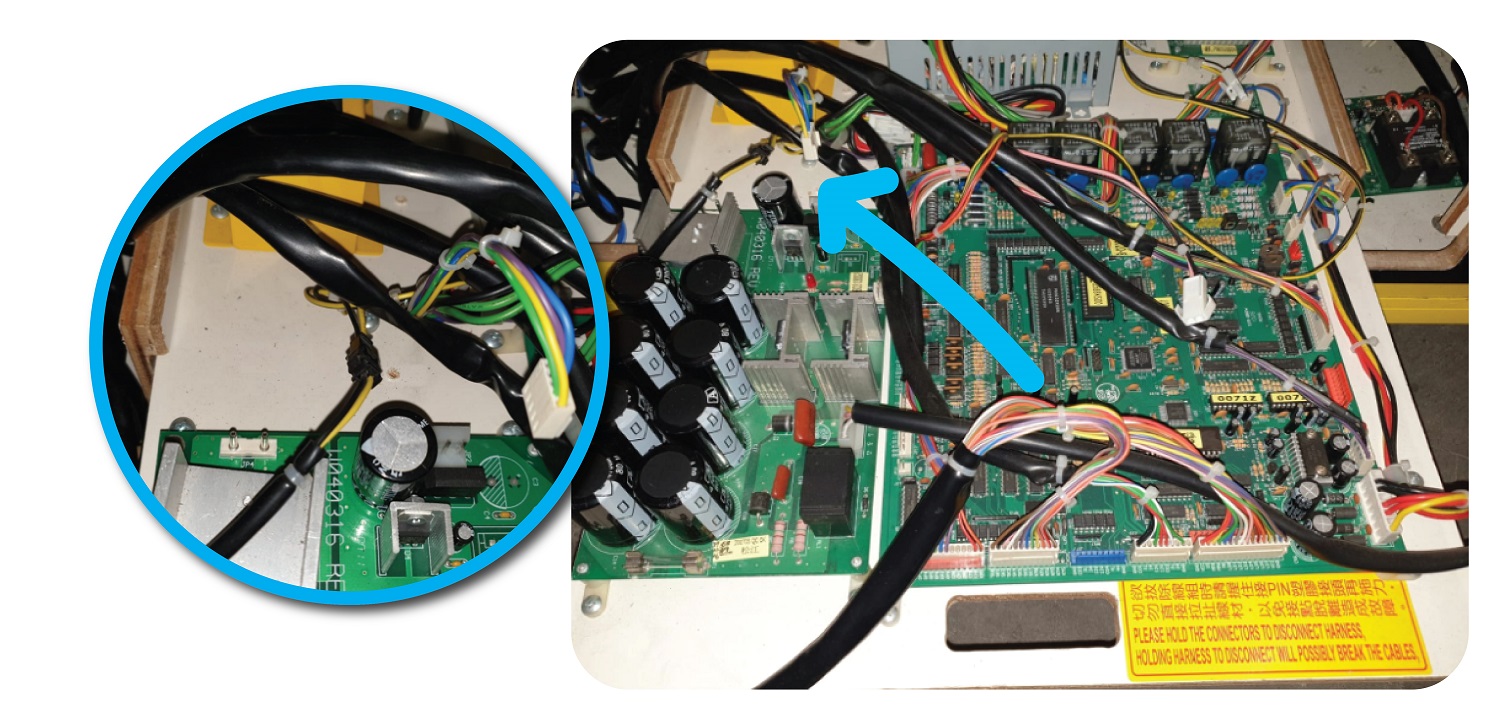
For Large, Jumbo:
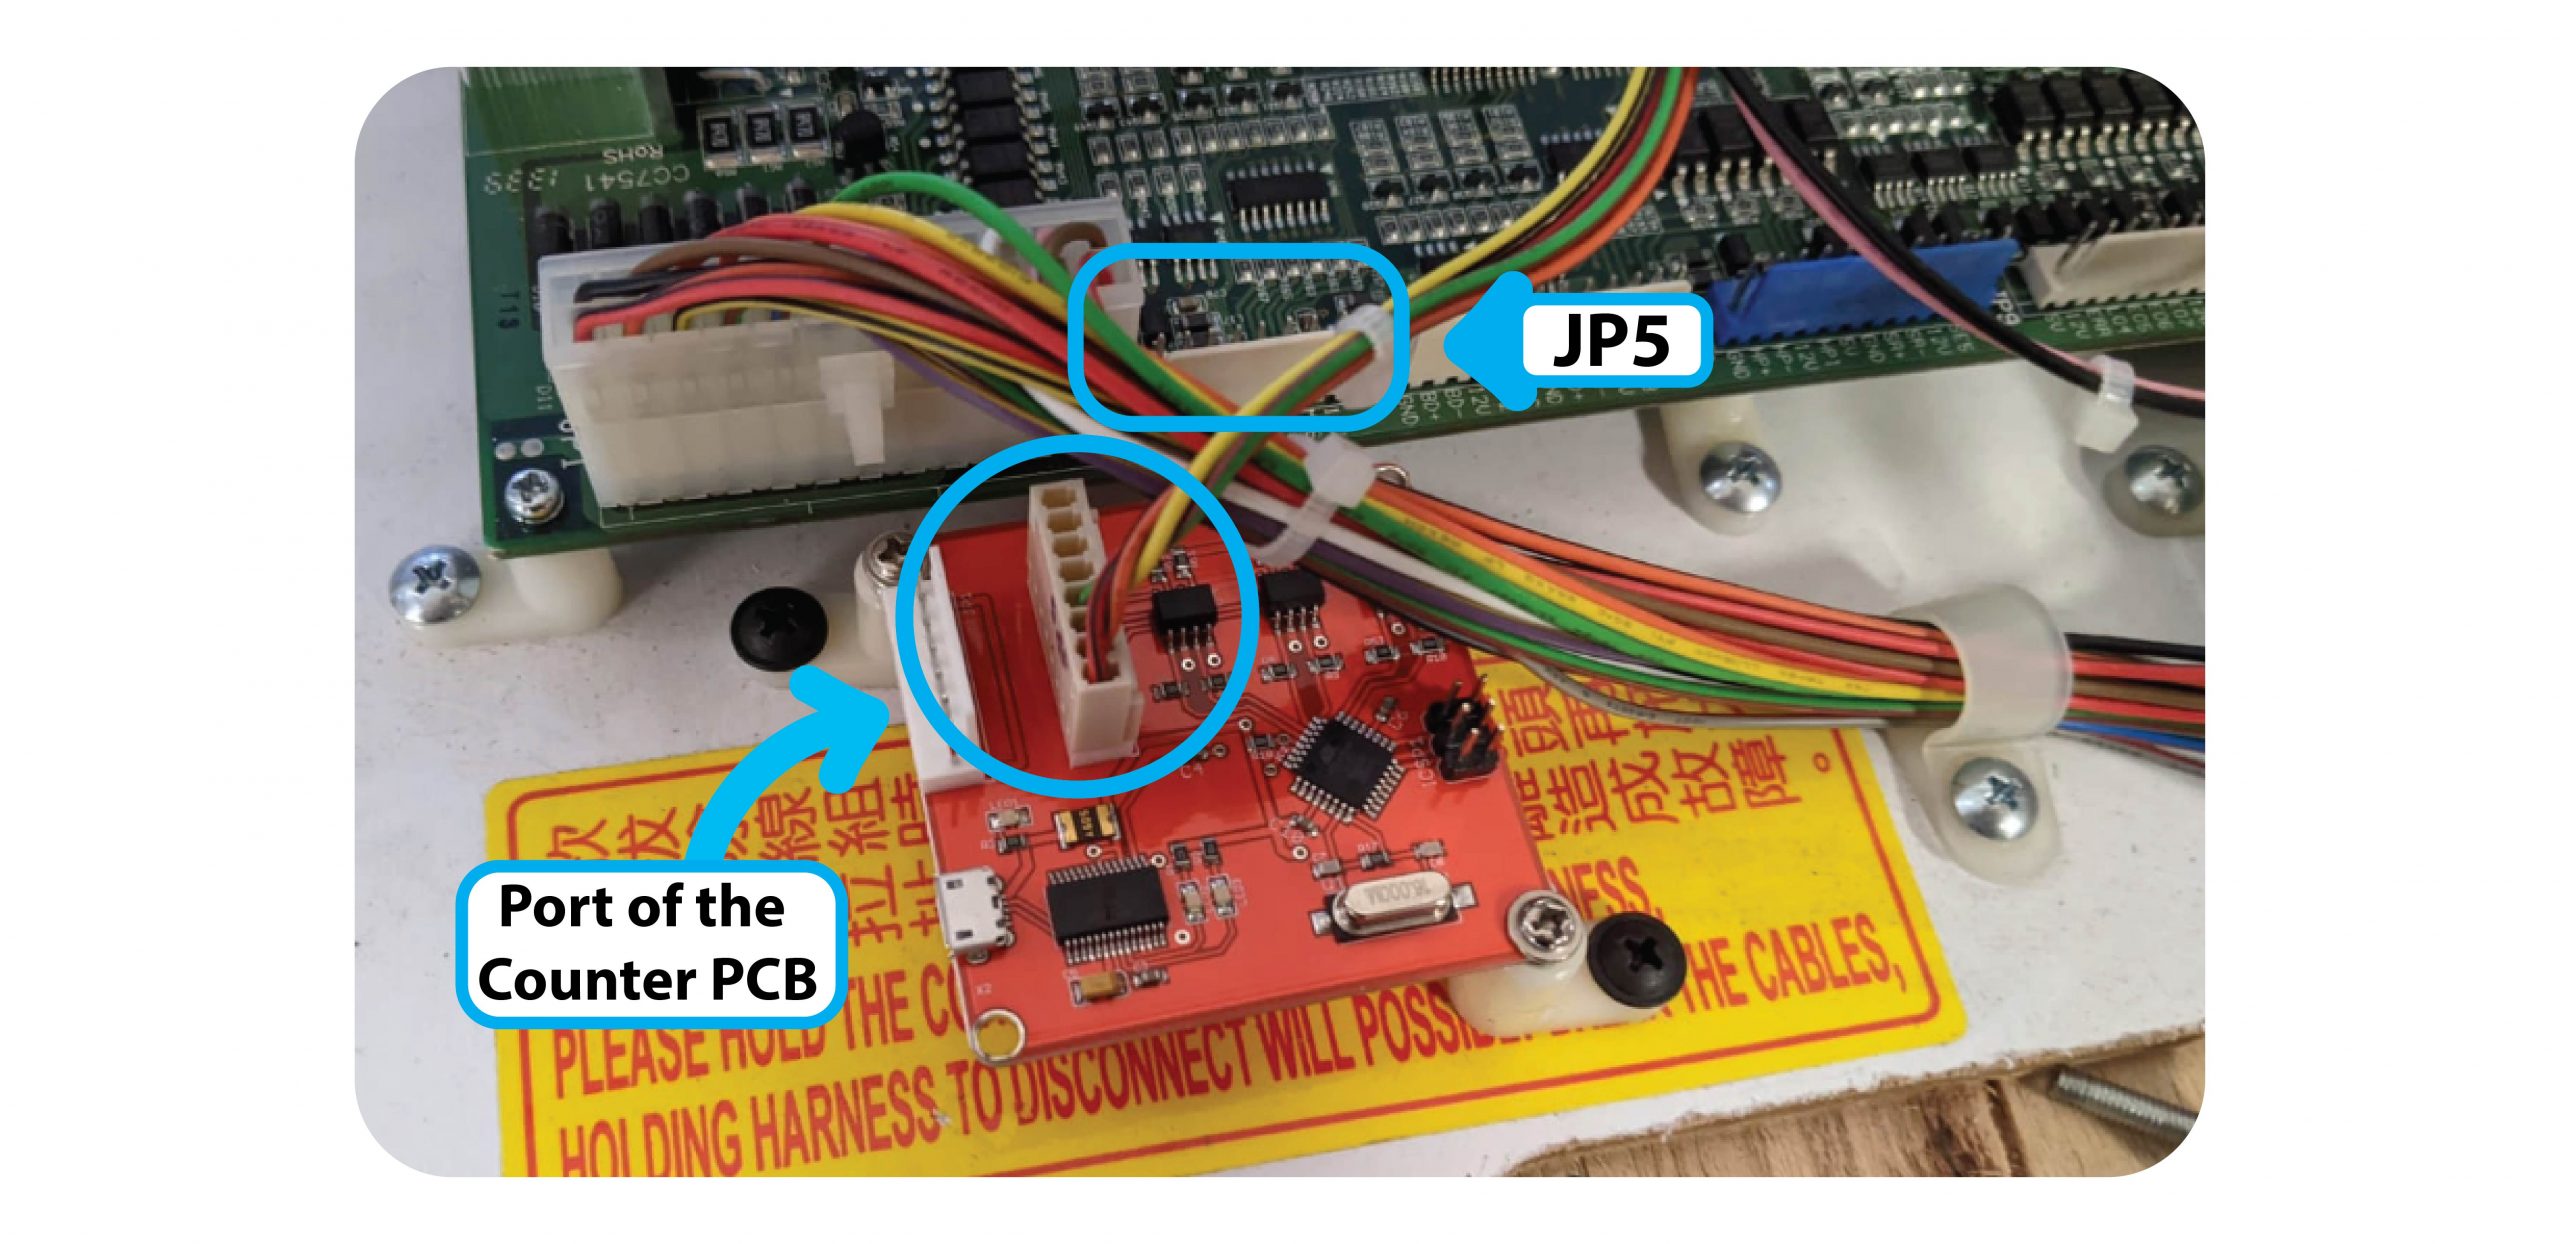
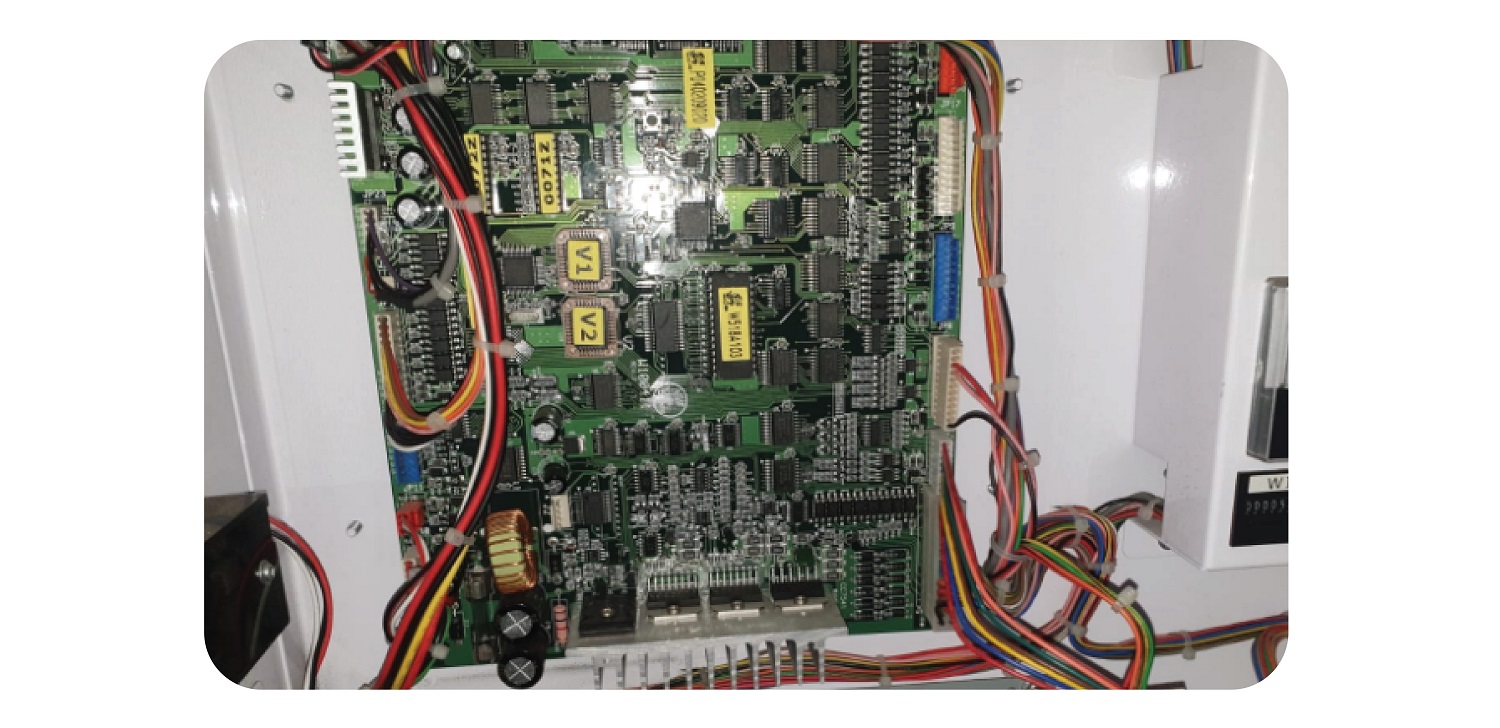
Open up the back of the machine and screw the new board onto the sliding board that houses the PCB, next to the JP5 port.:
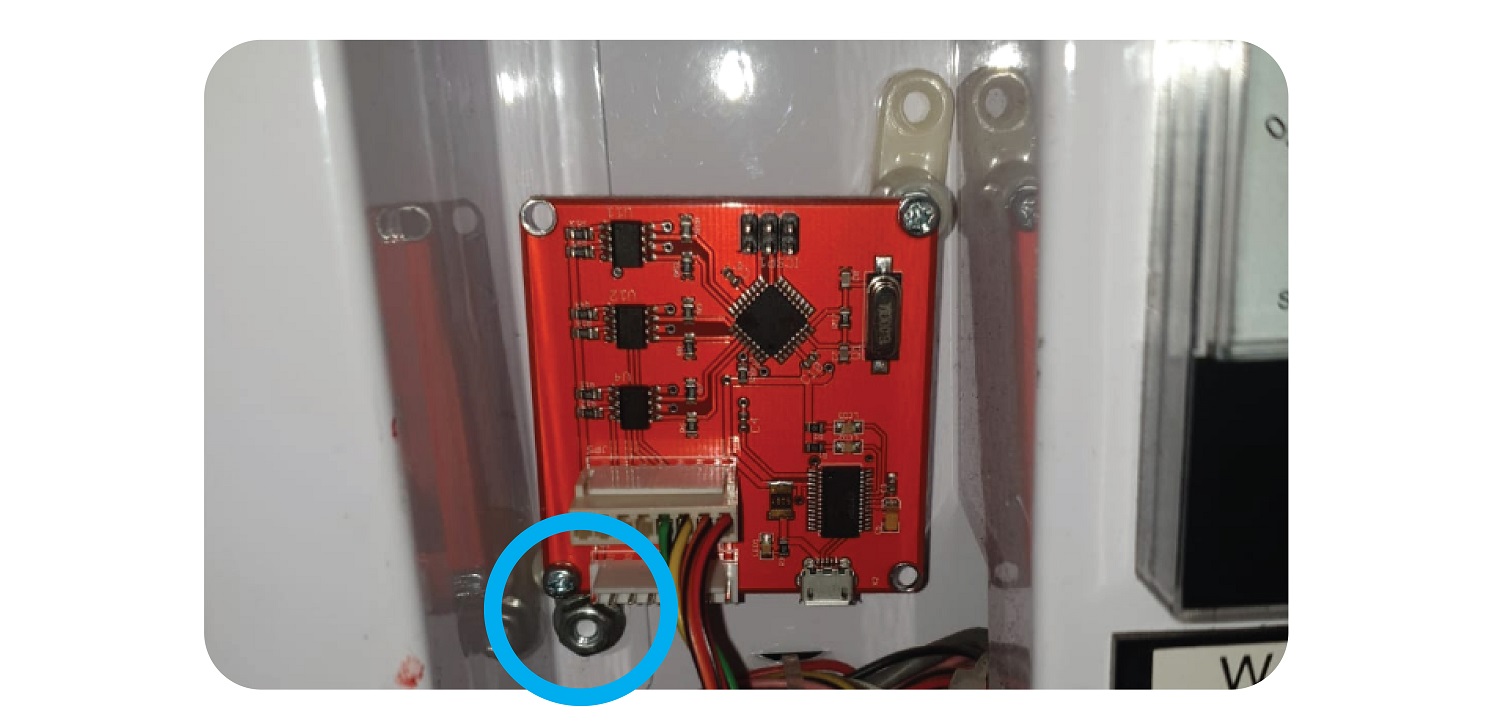
For The Claw Large, install the 2 feet at the top of the Counter PCB.
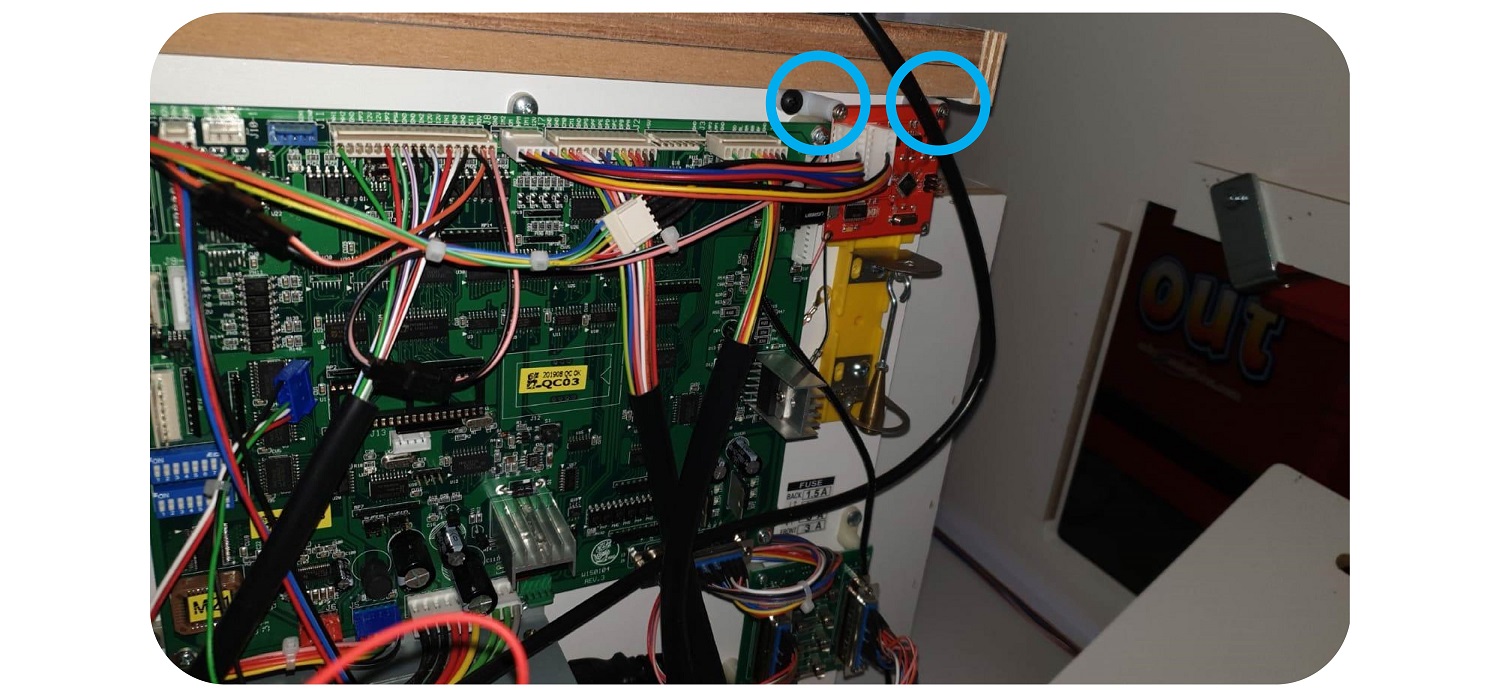
Install it to the right, above the Tilt Sensor like so
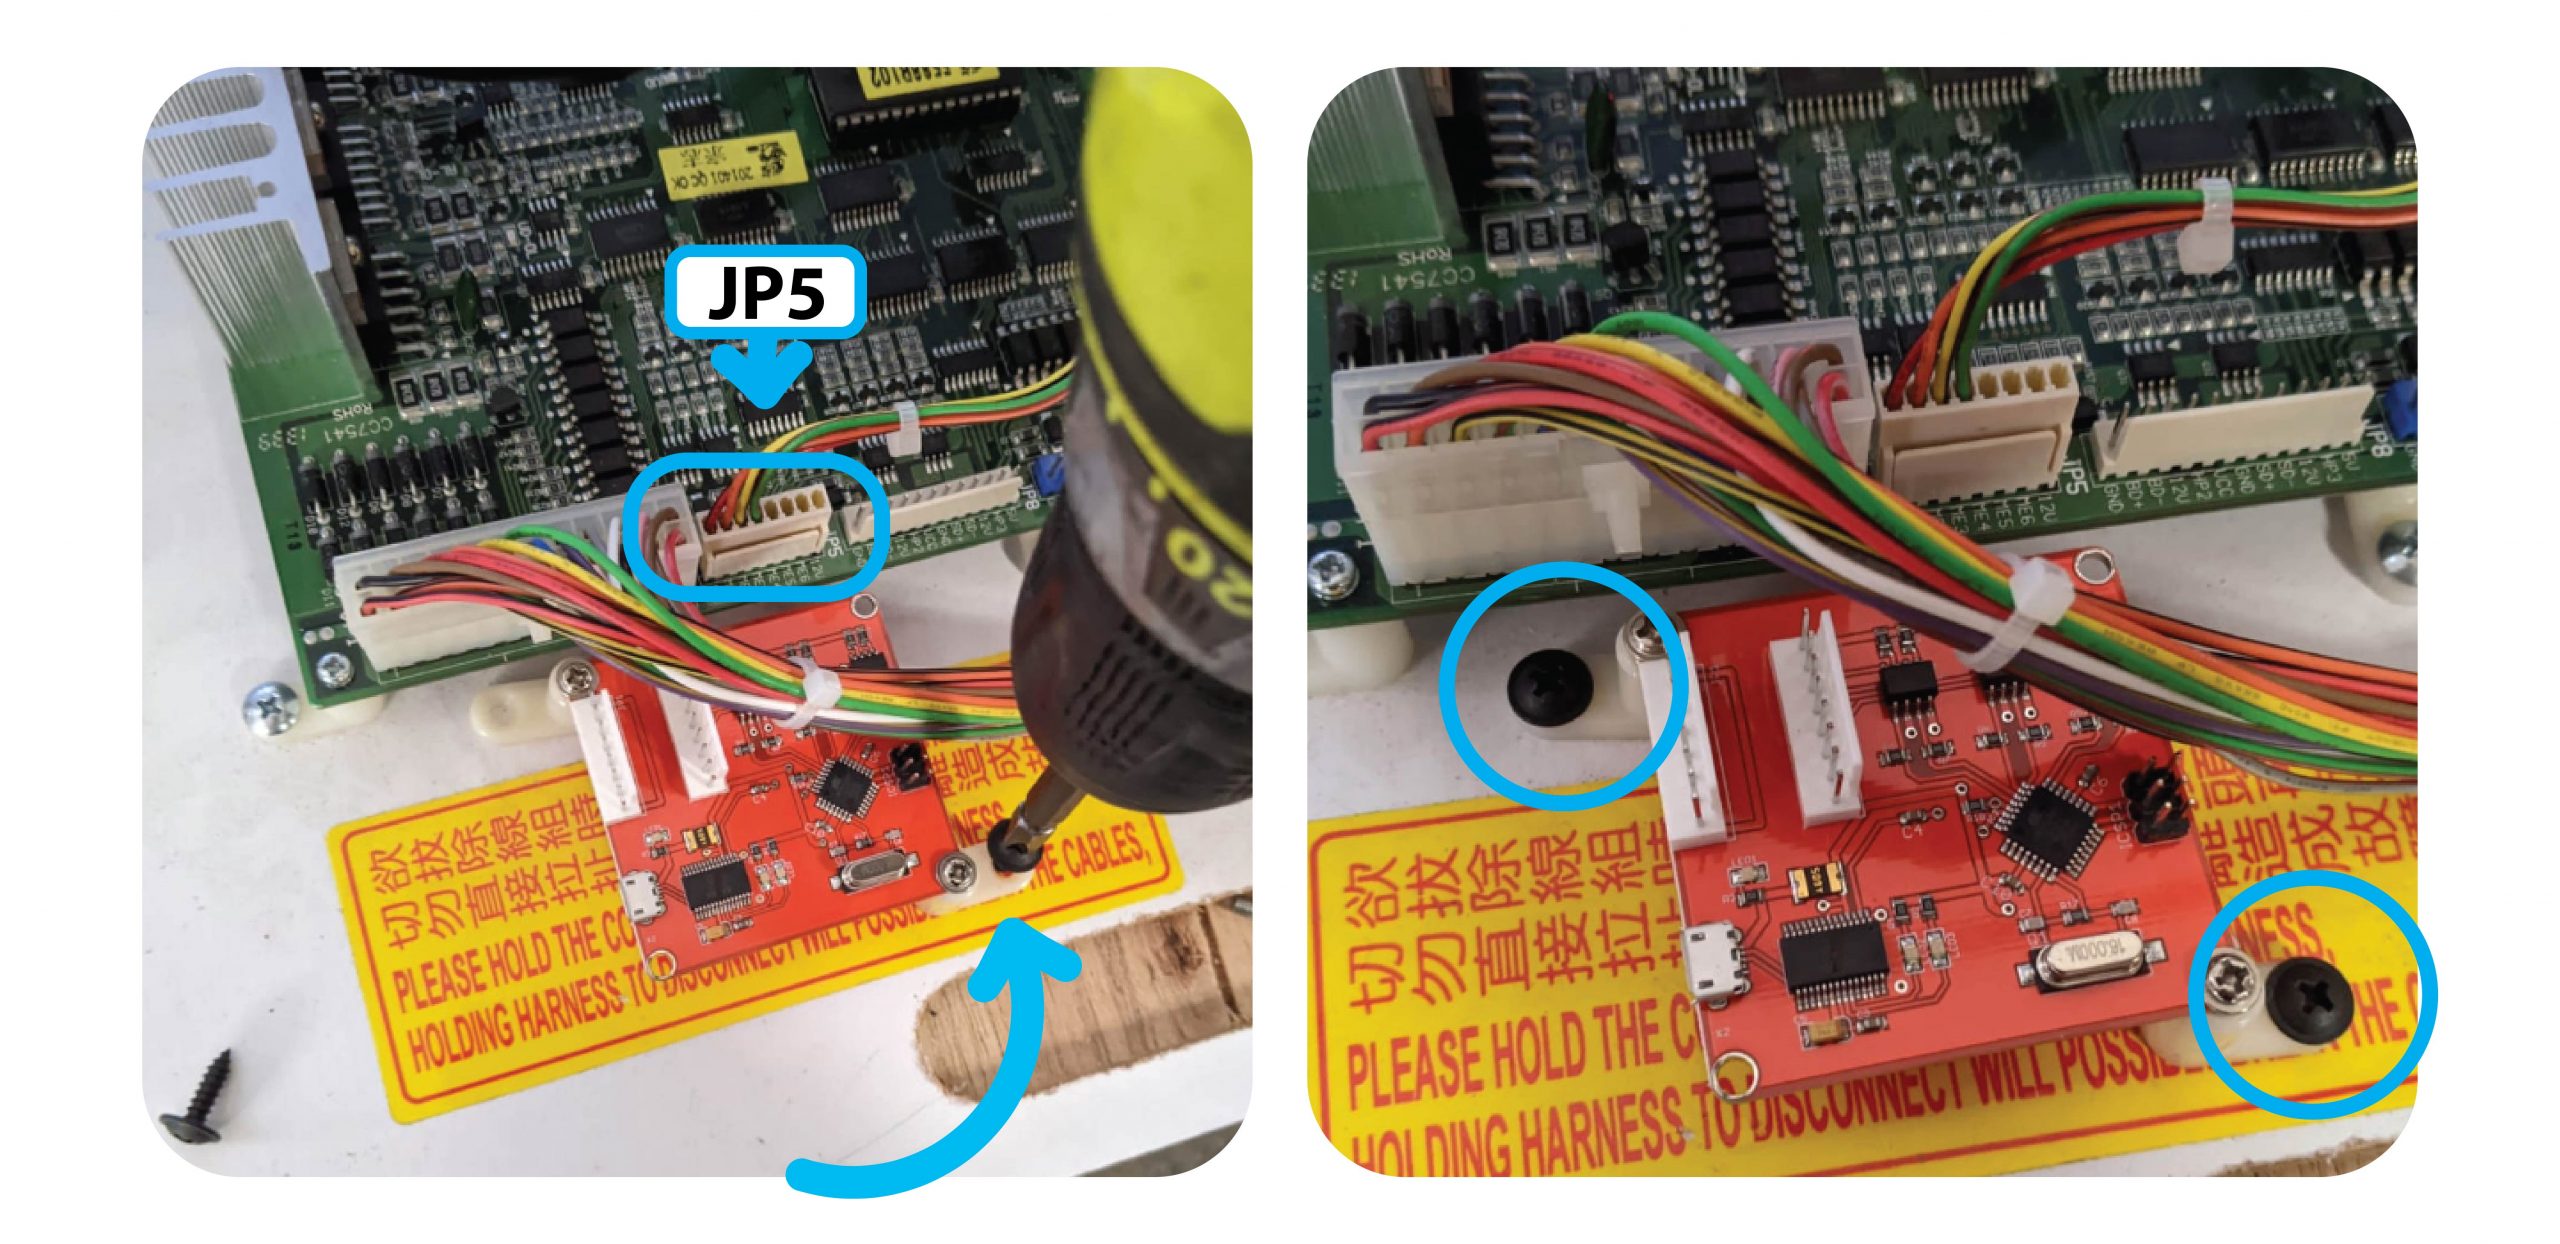
Step 2:
Remove the Meter wire from the JP5 connector, and add it to the inside port of the Coin & Bill counter:
Step 3:
Add the PCB to Counter PCB Cable to the outside port of the counter PCB.
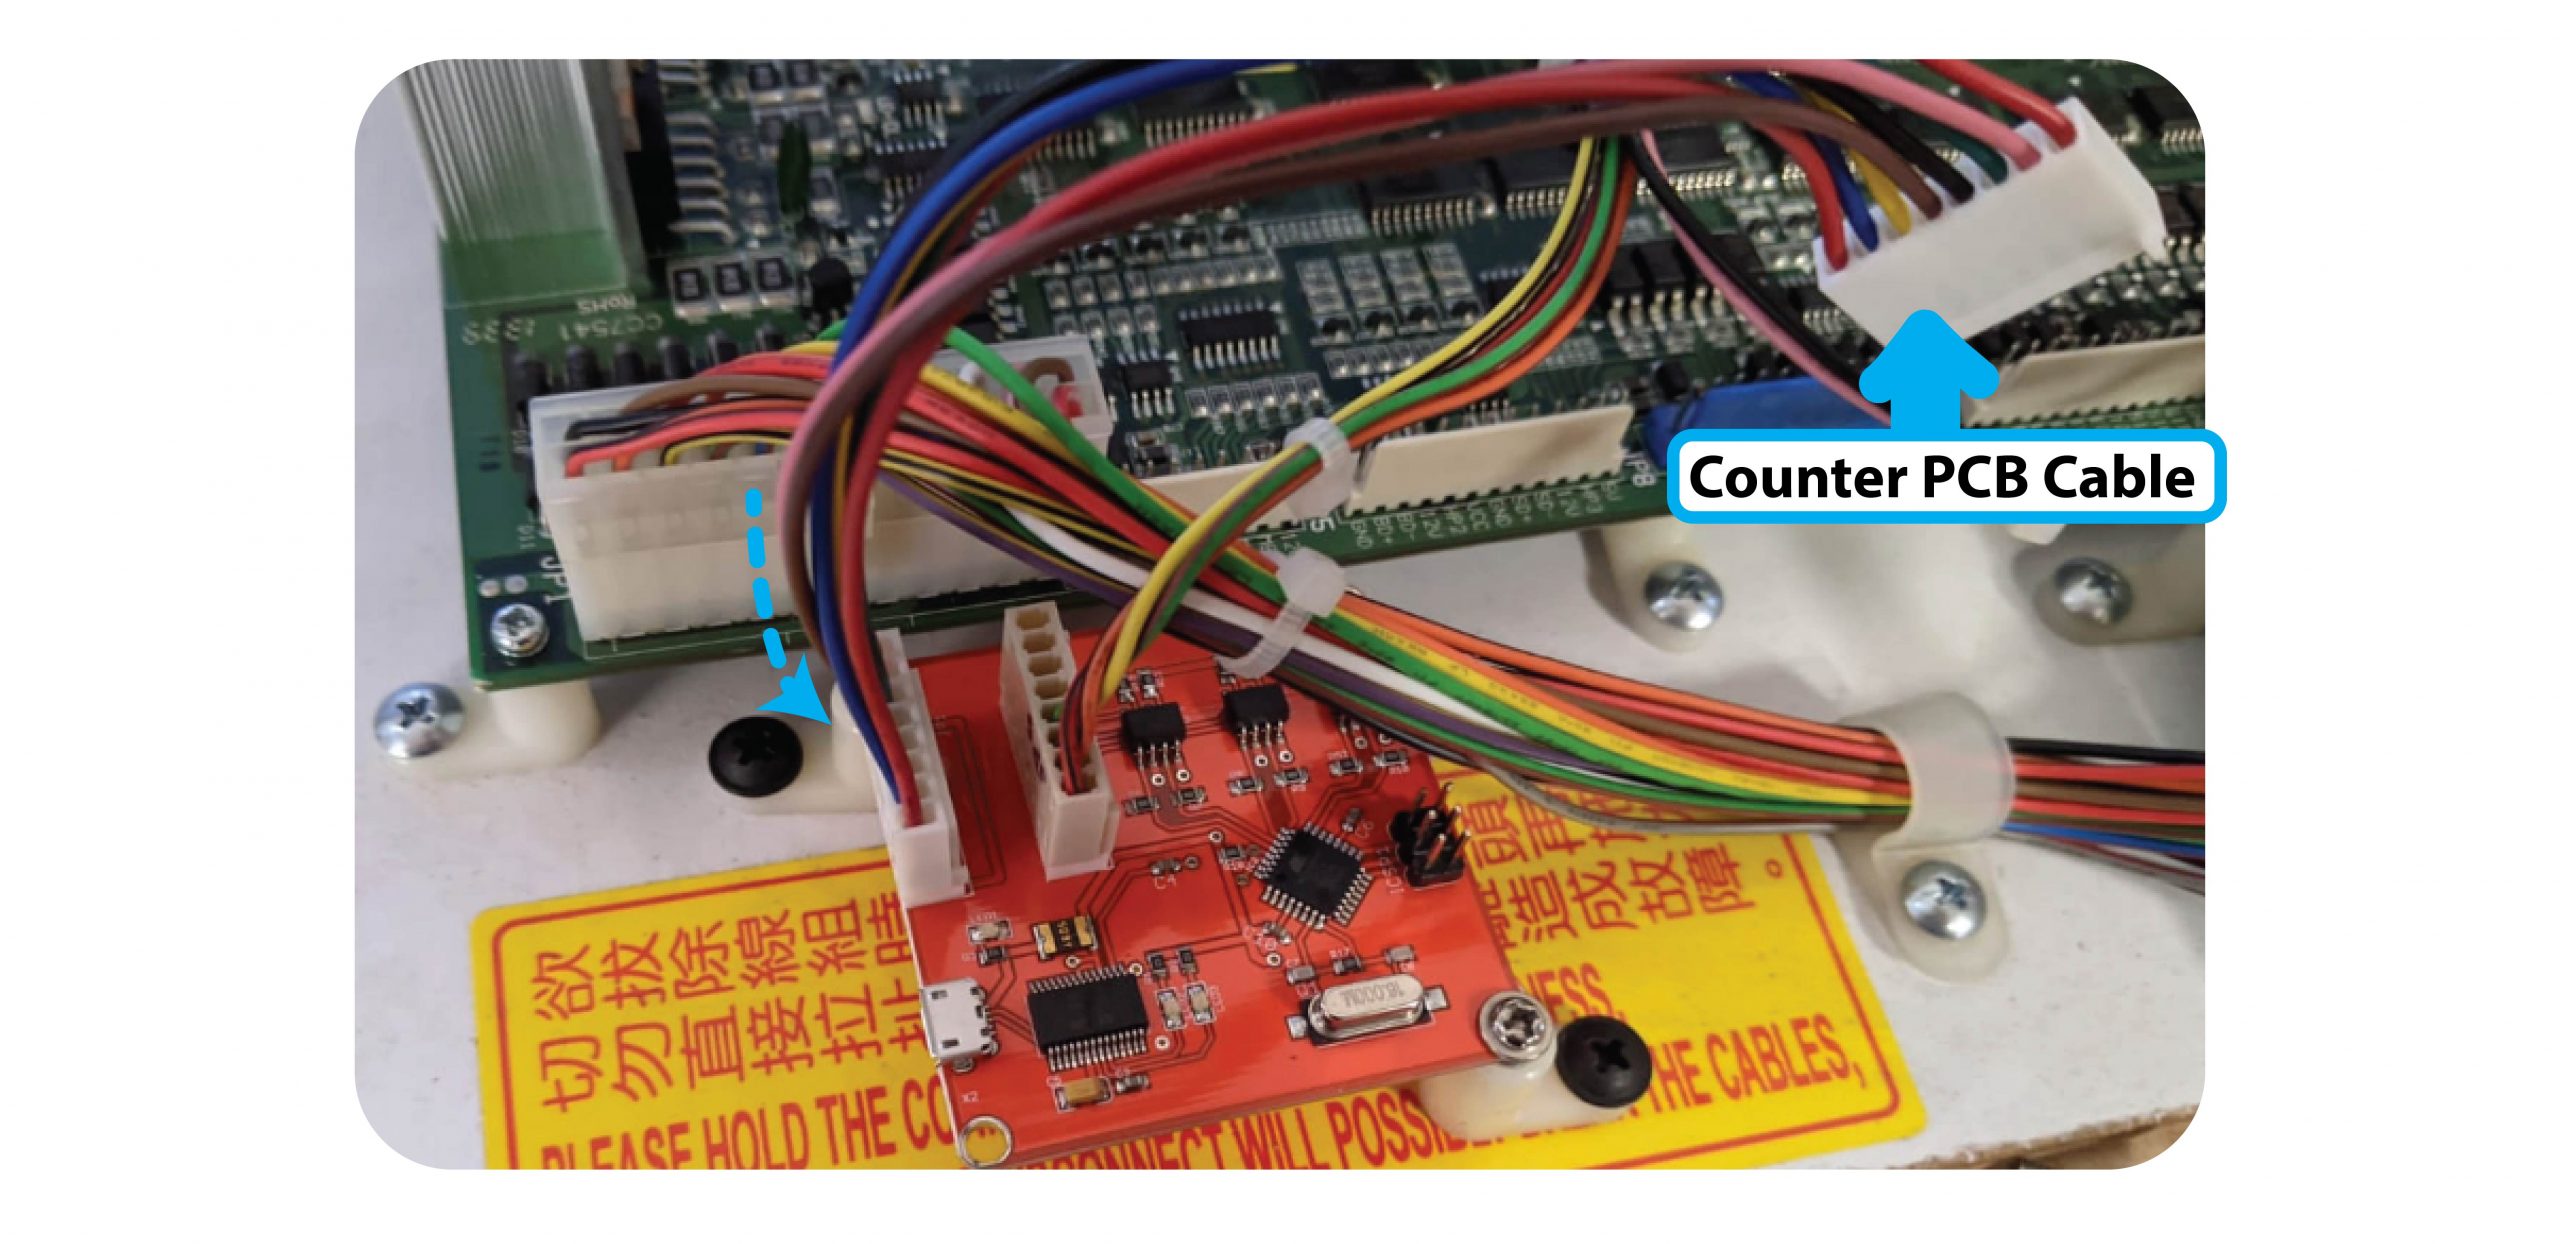
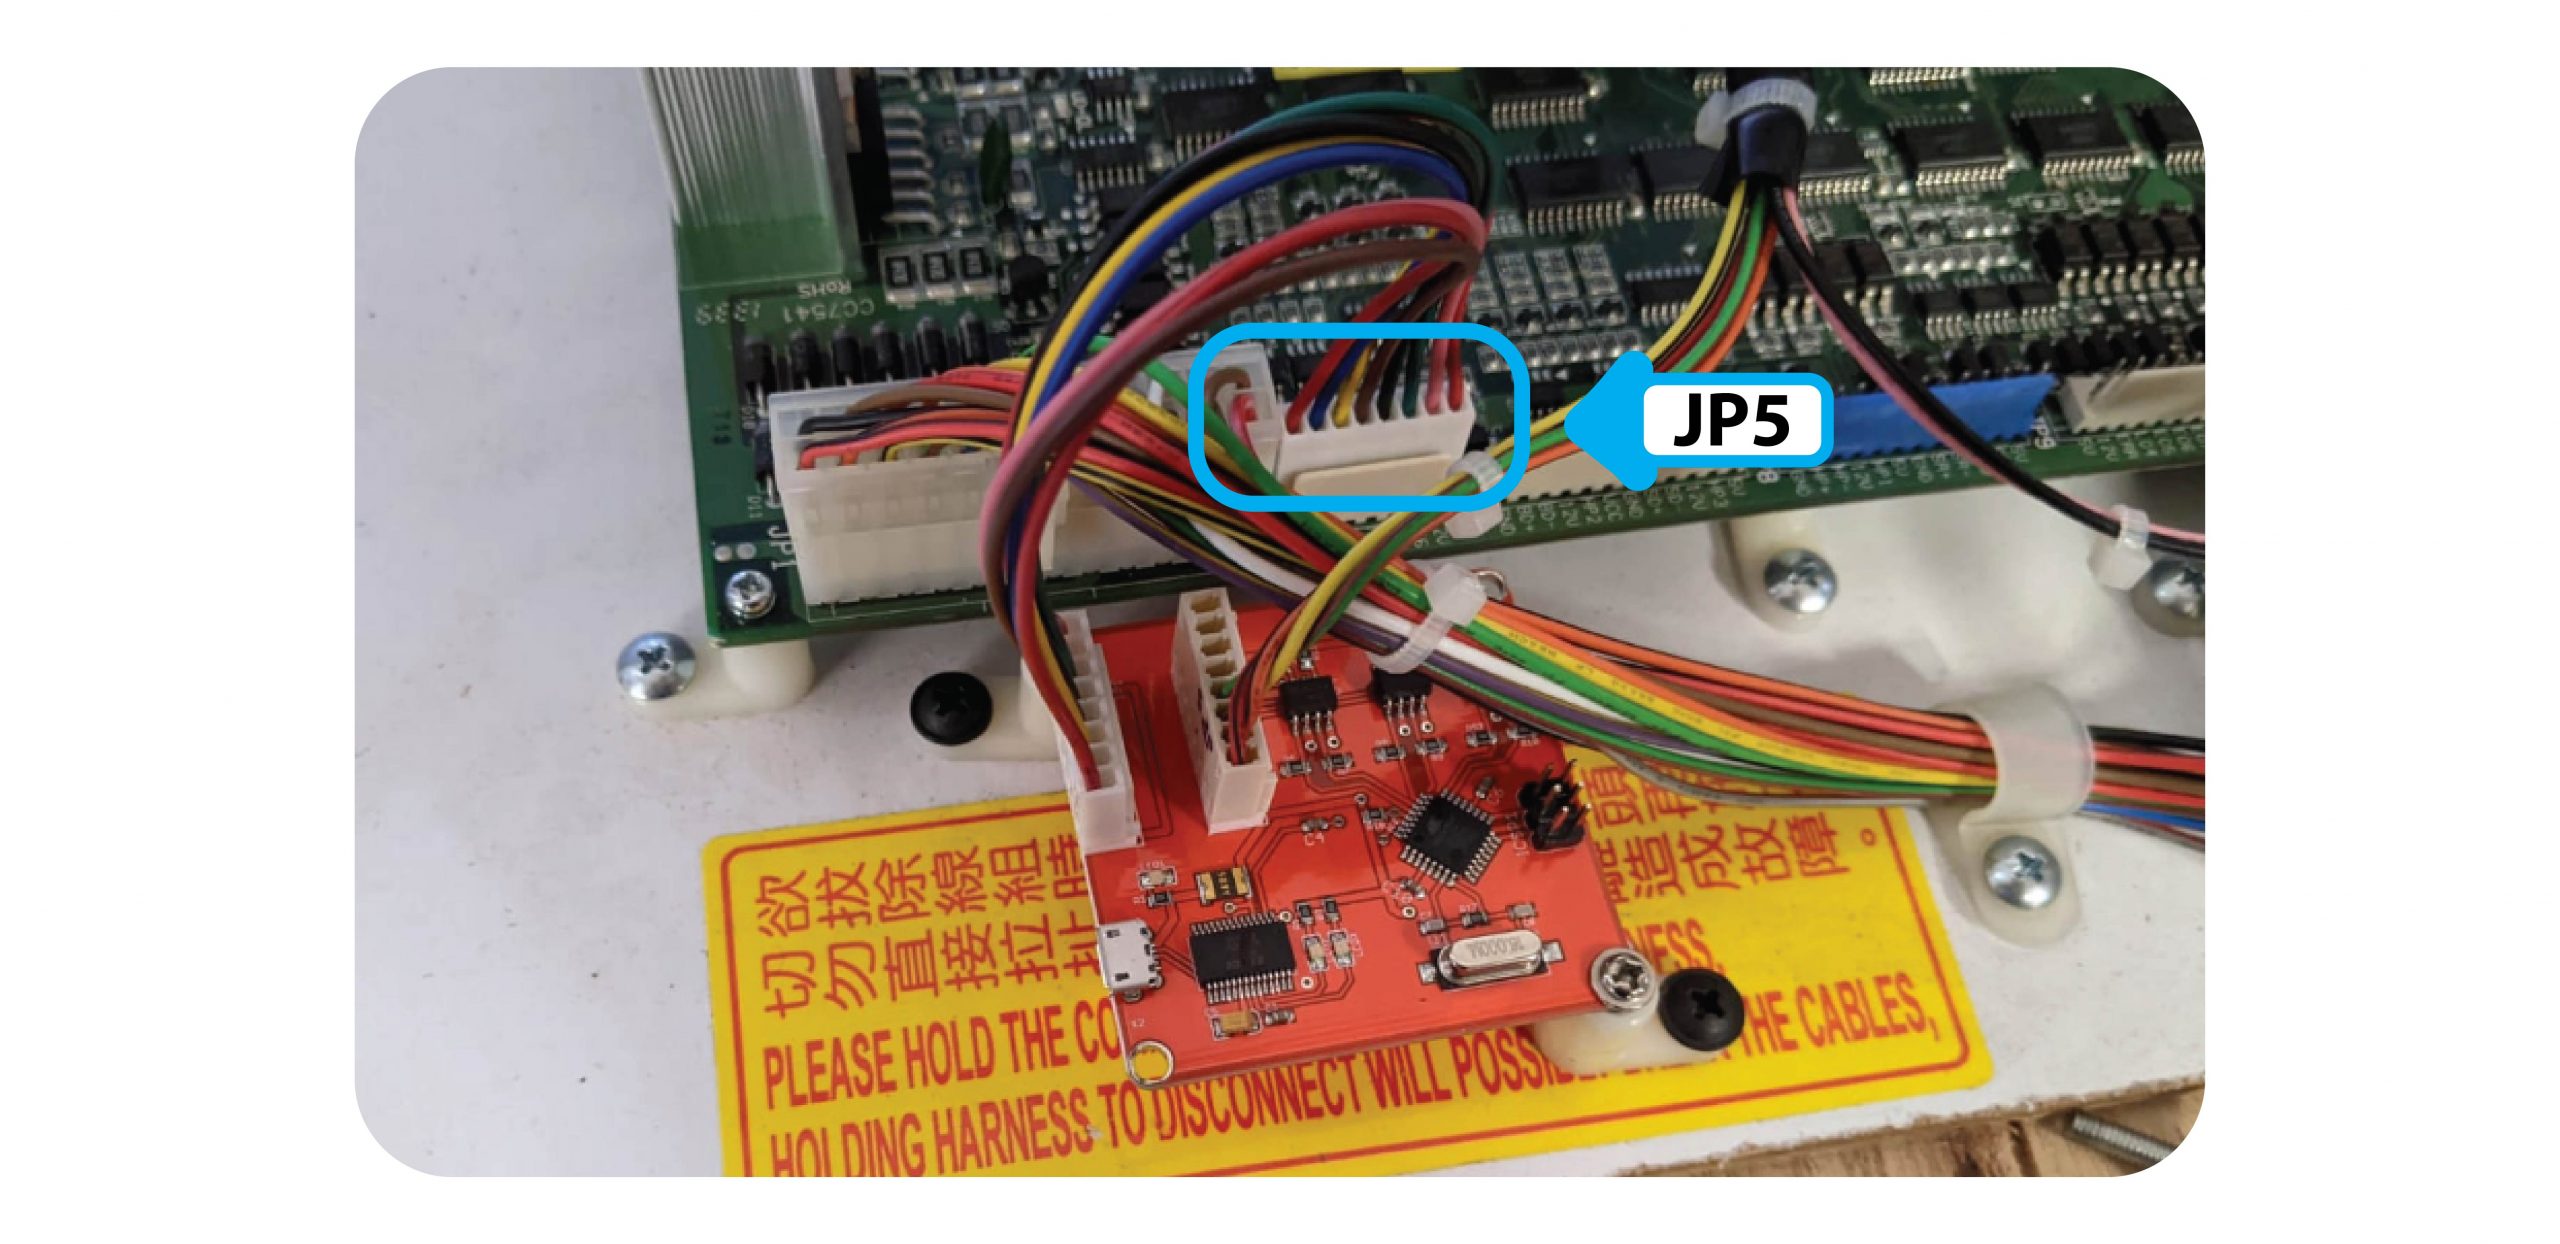
Then connect this Cable to the JP5 Cable of the board:
Step 4:
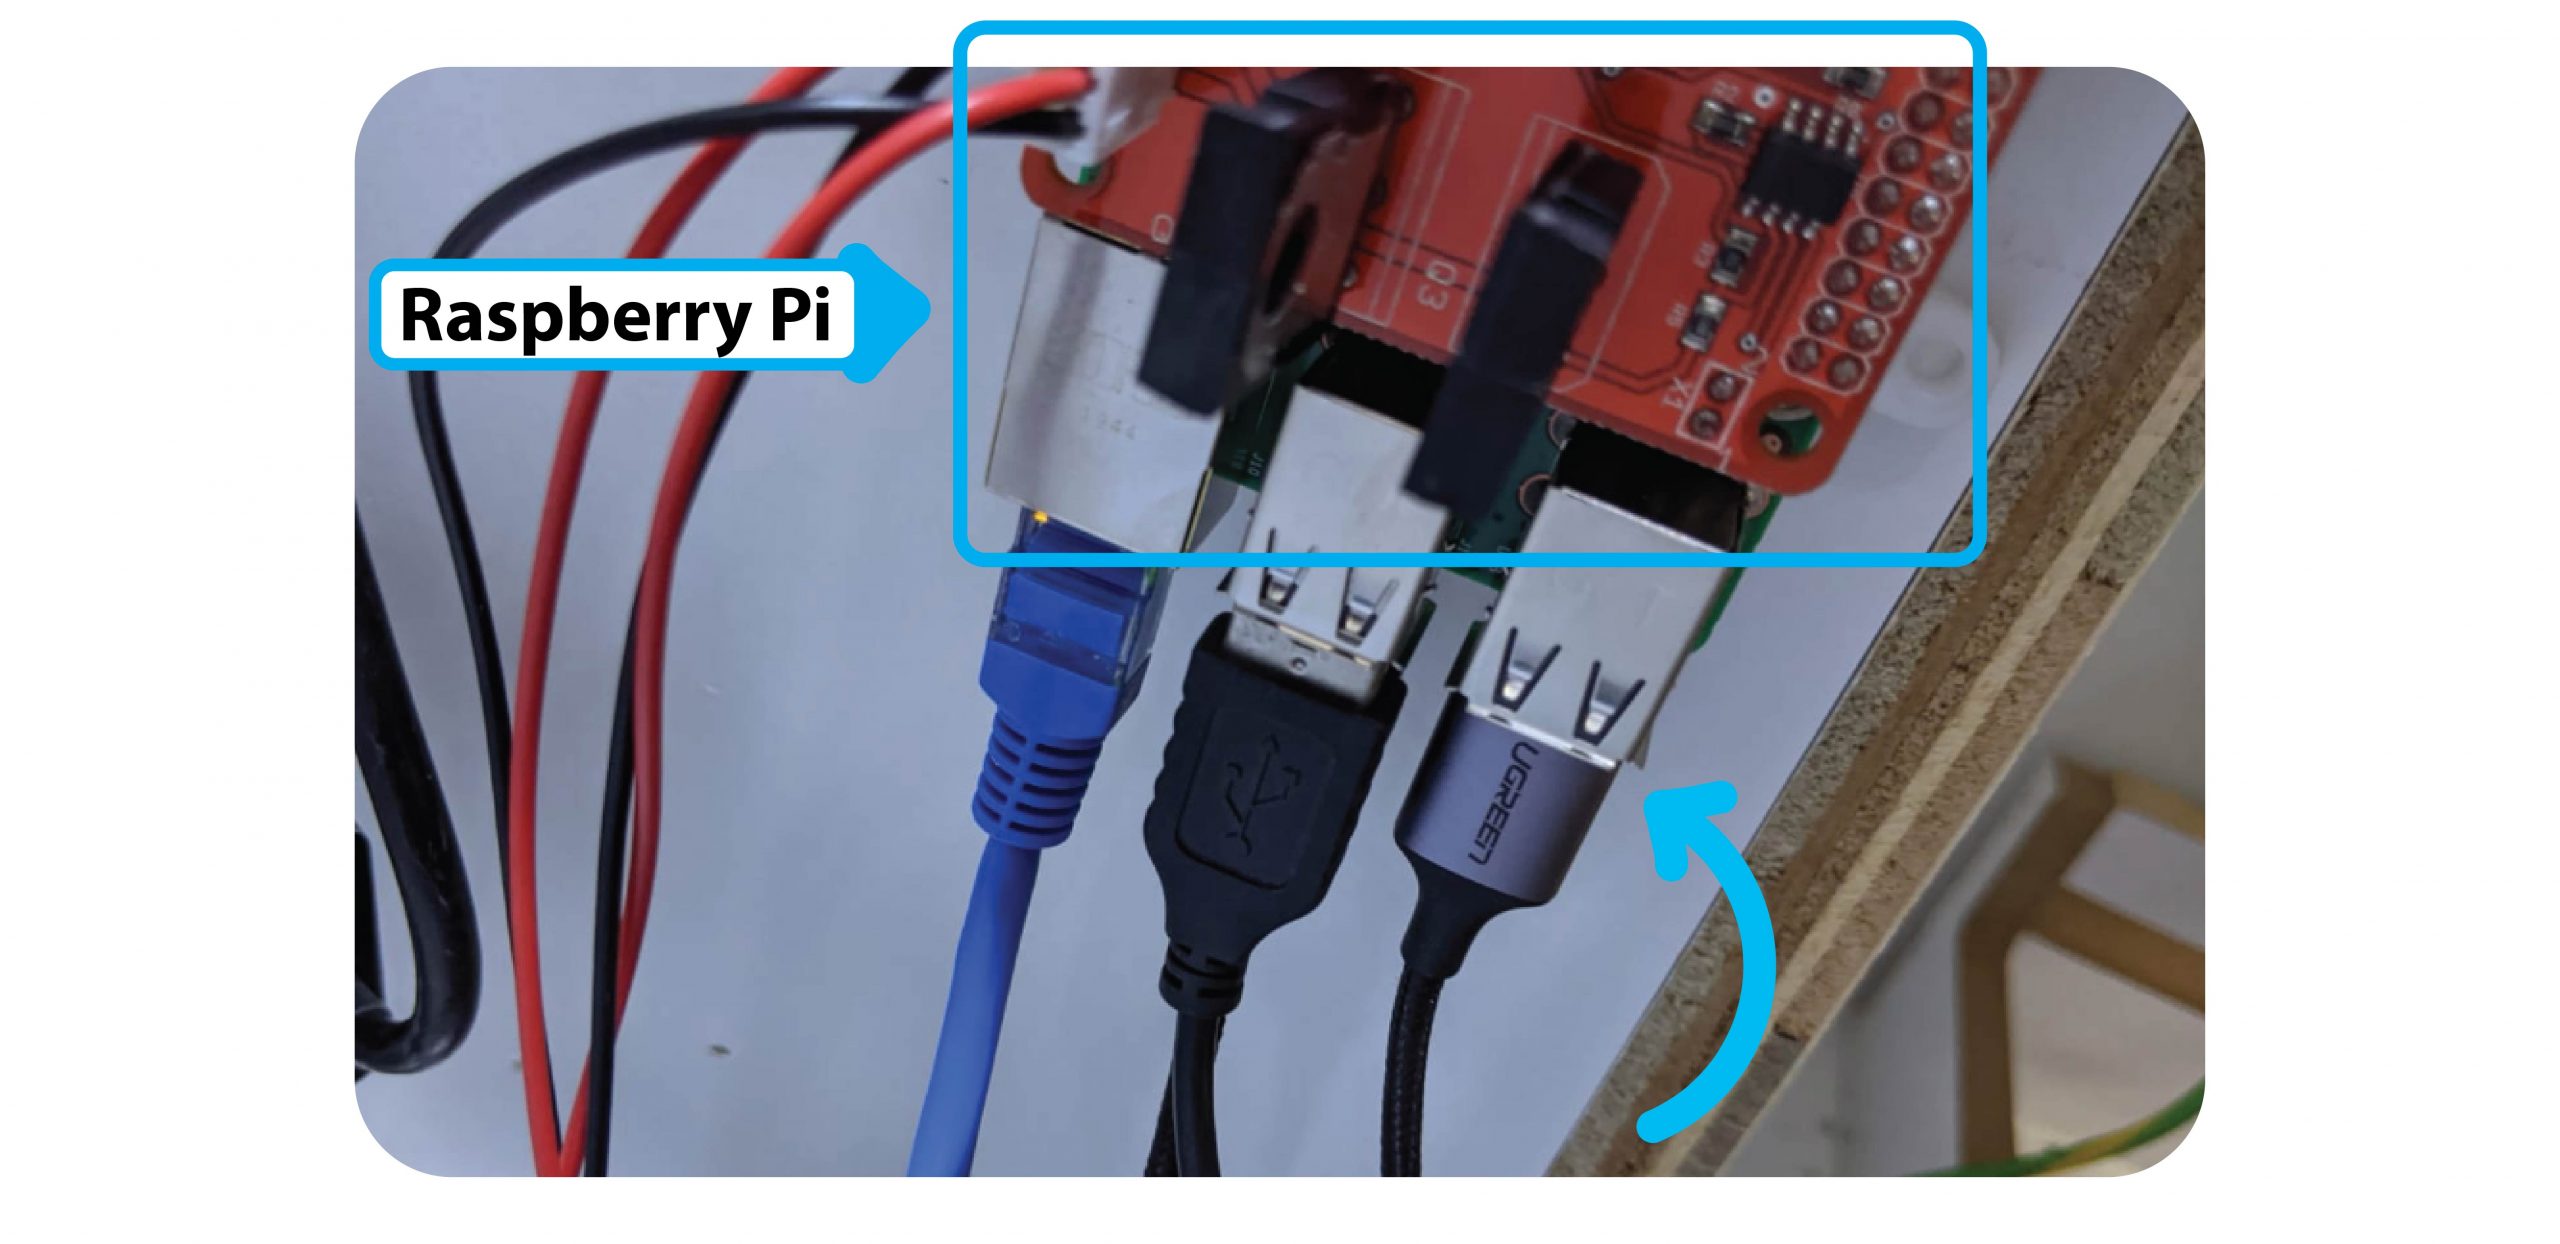
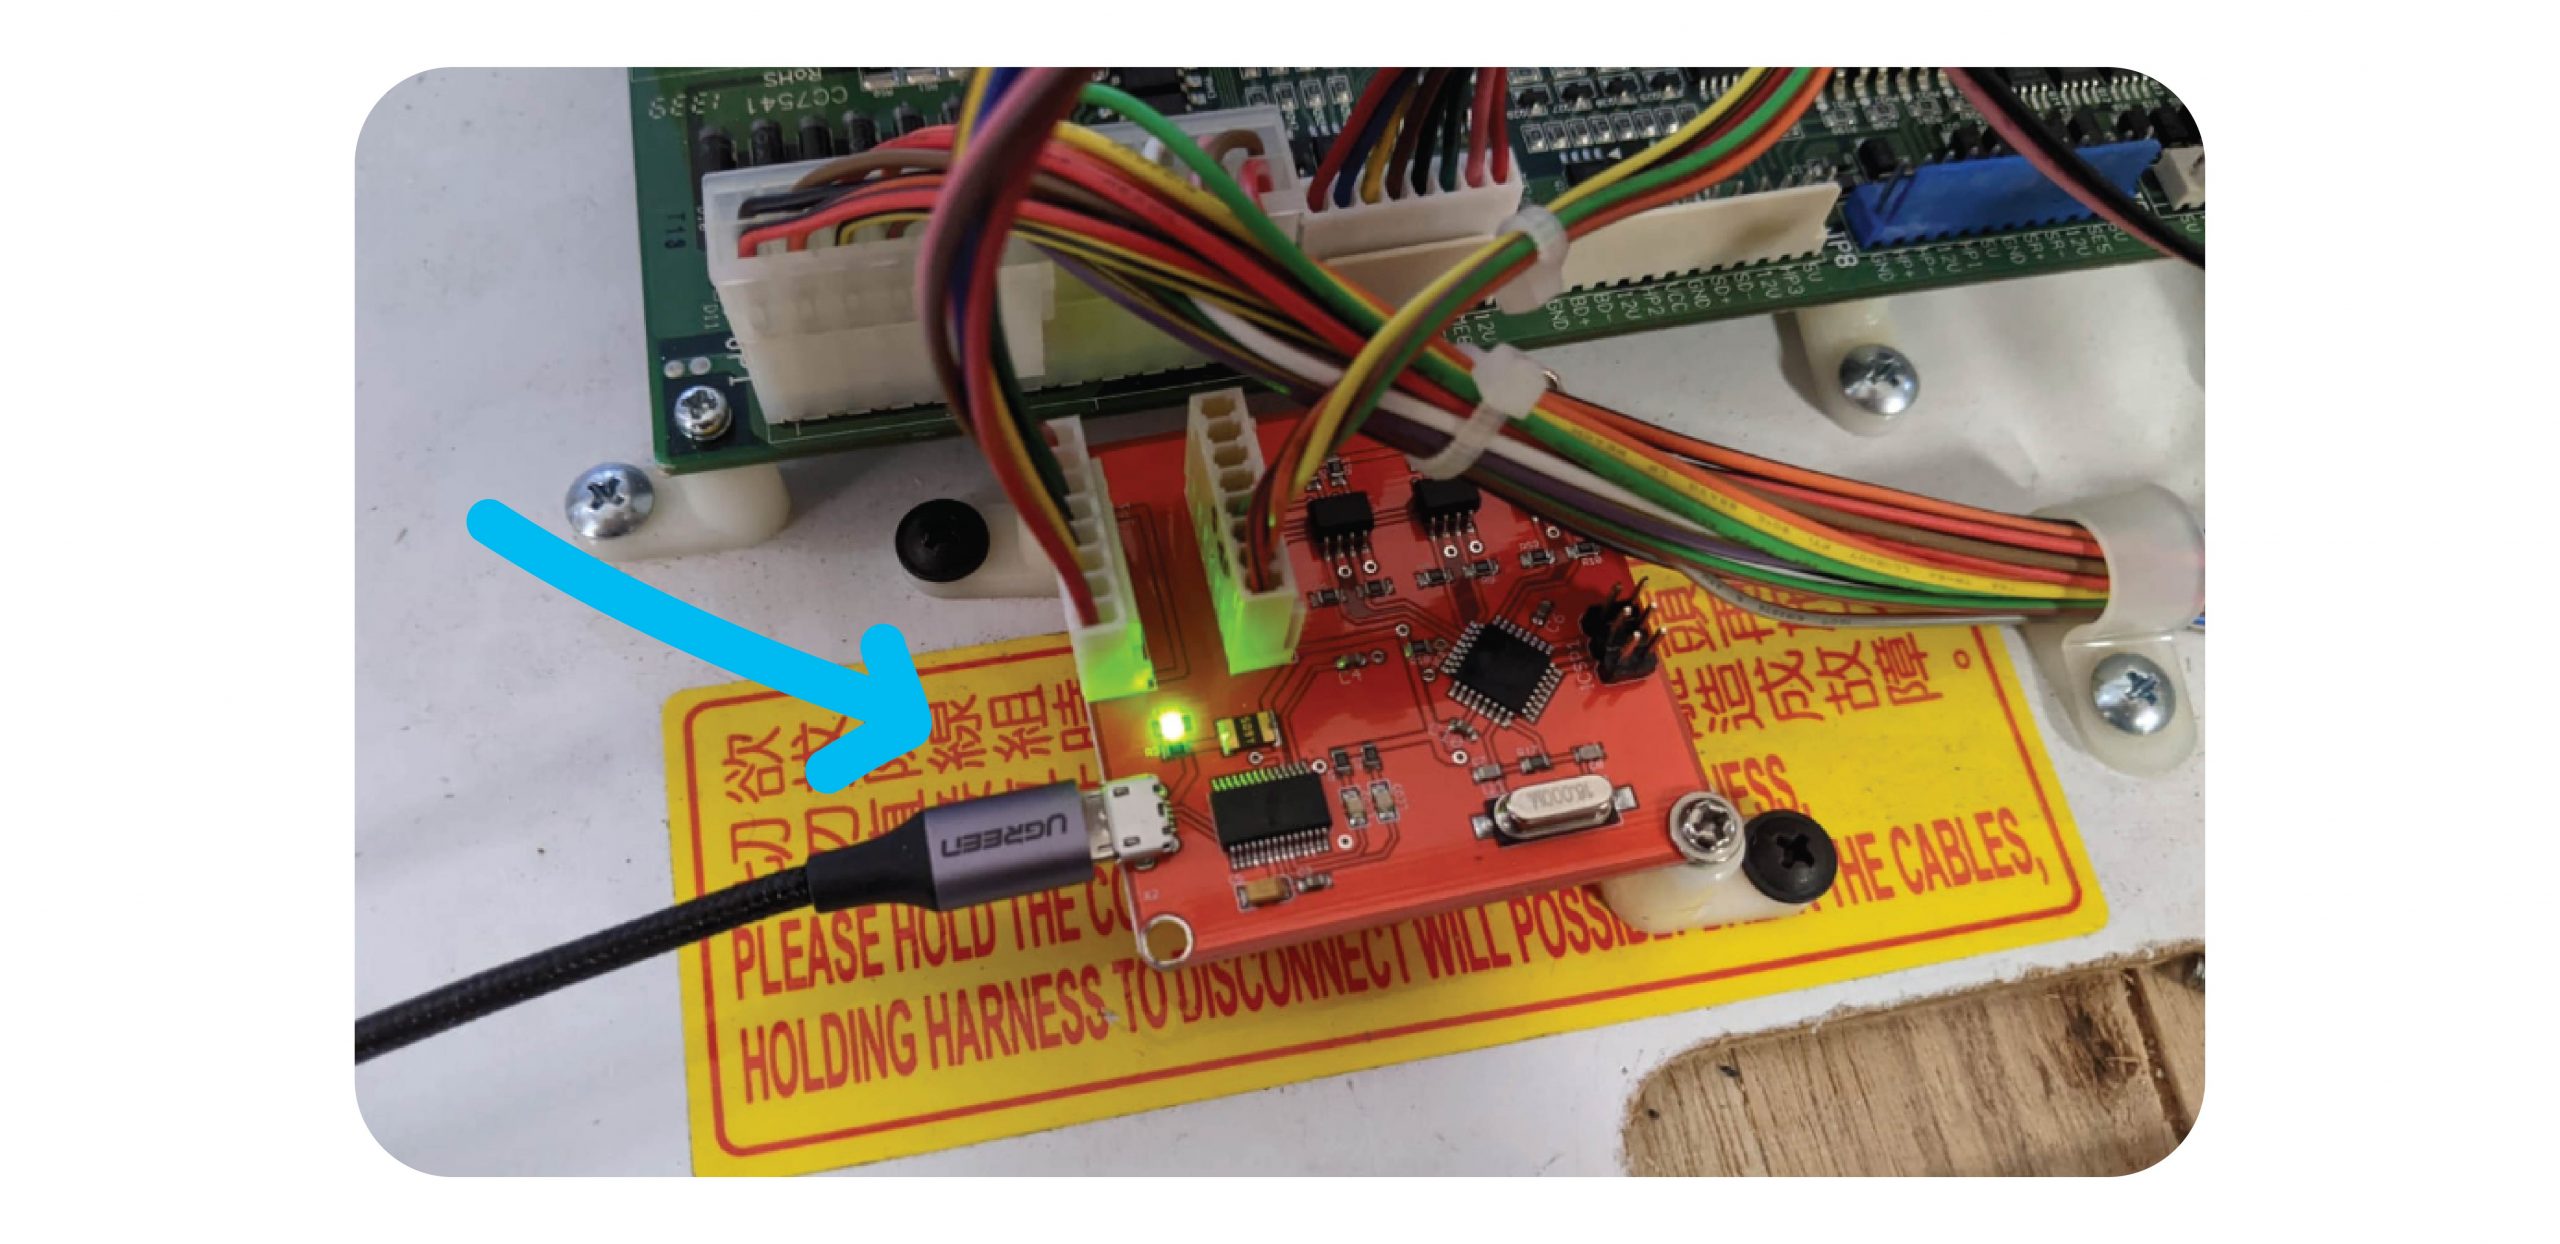
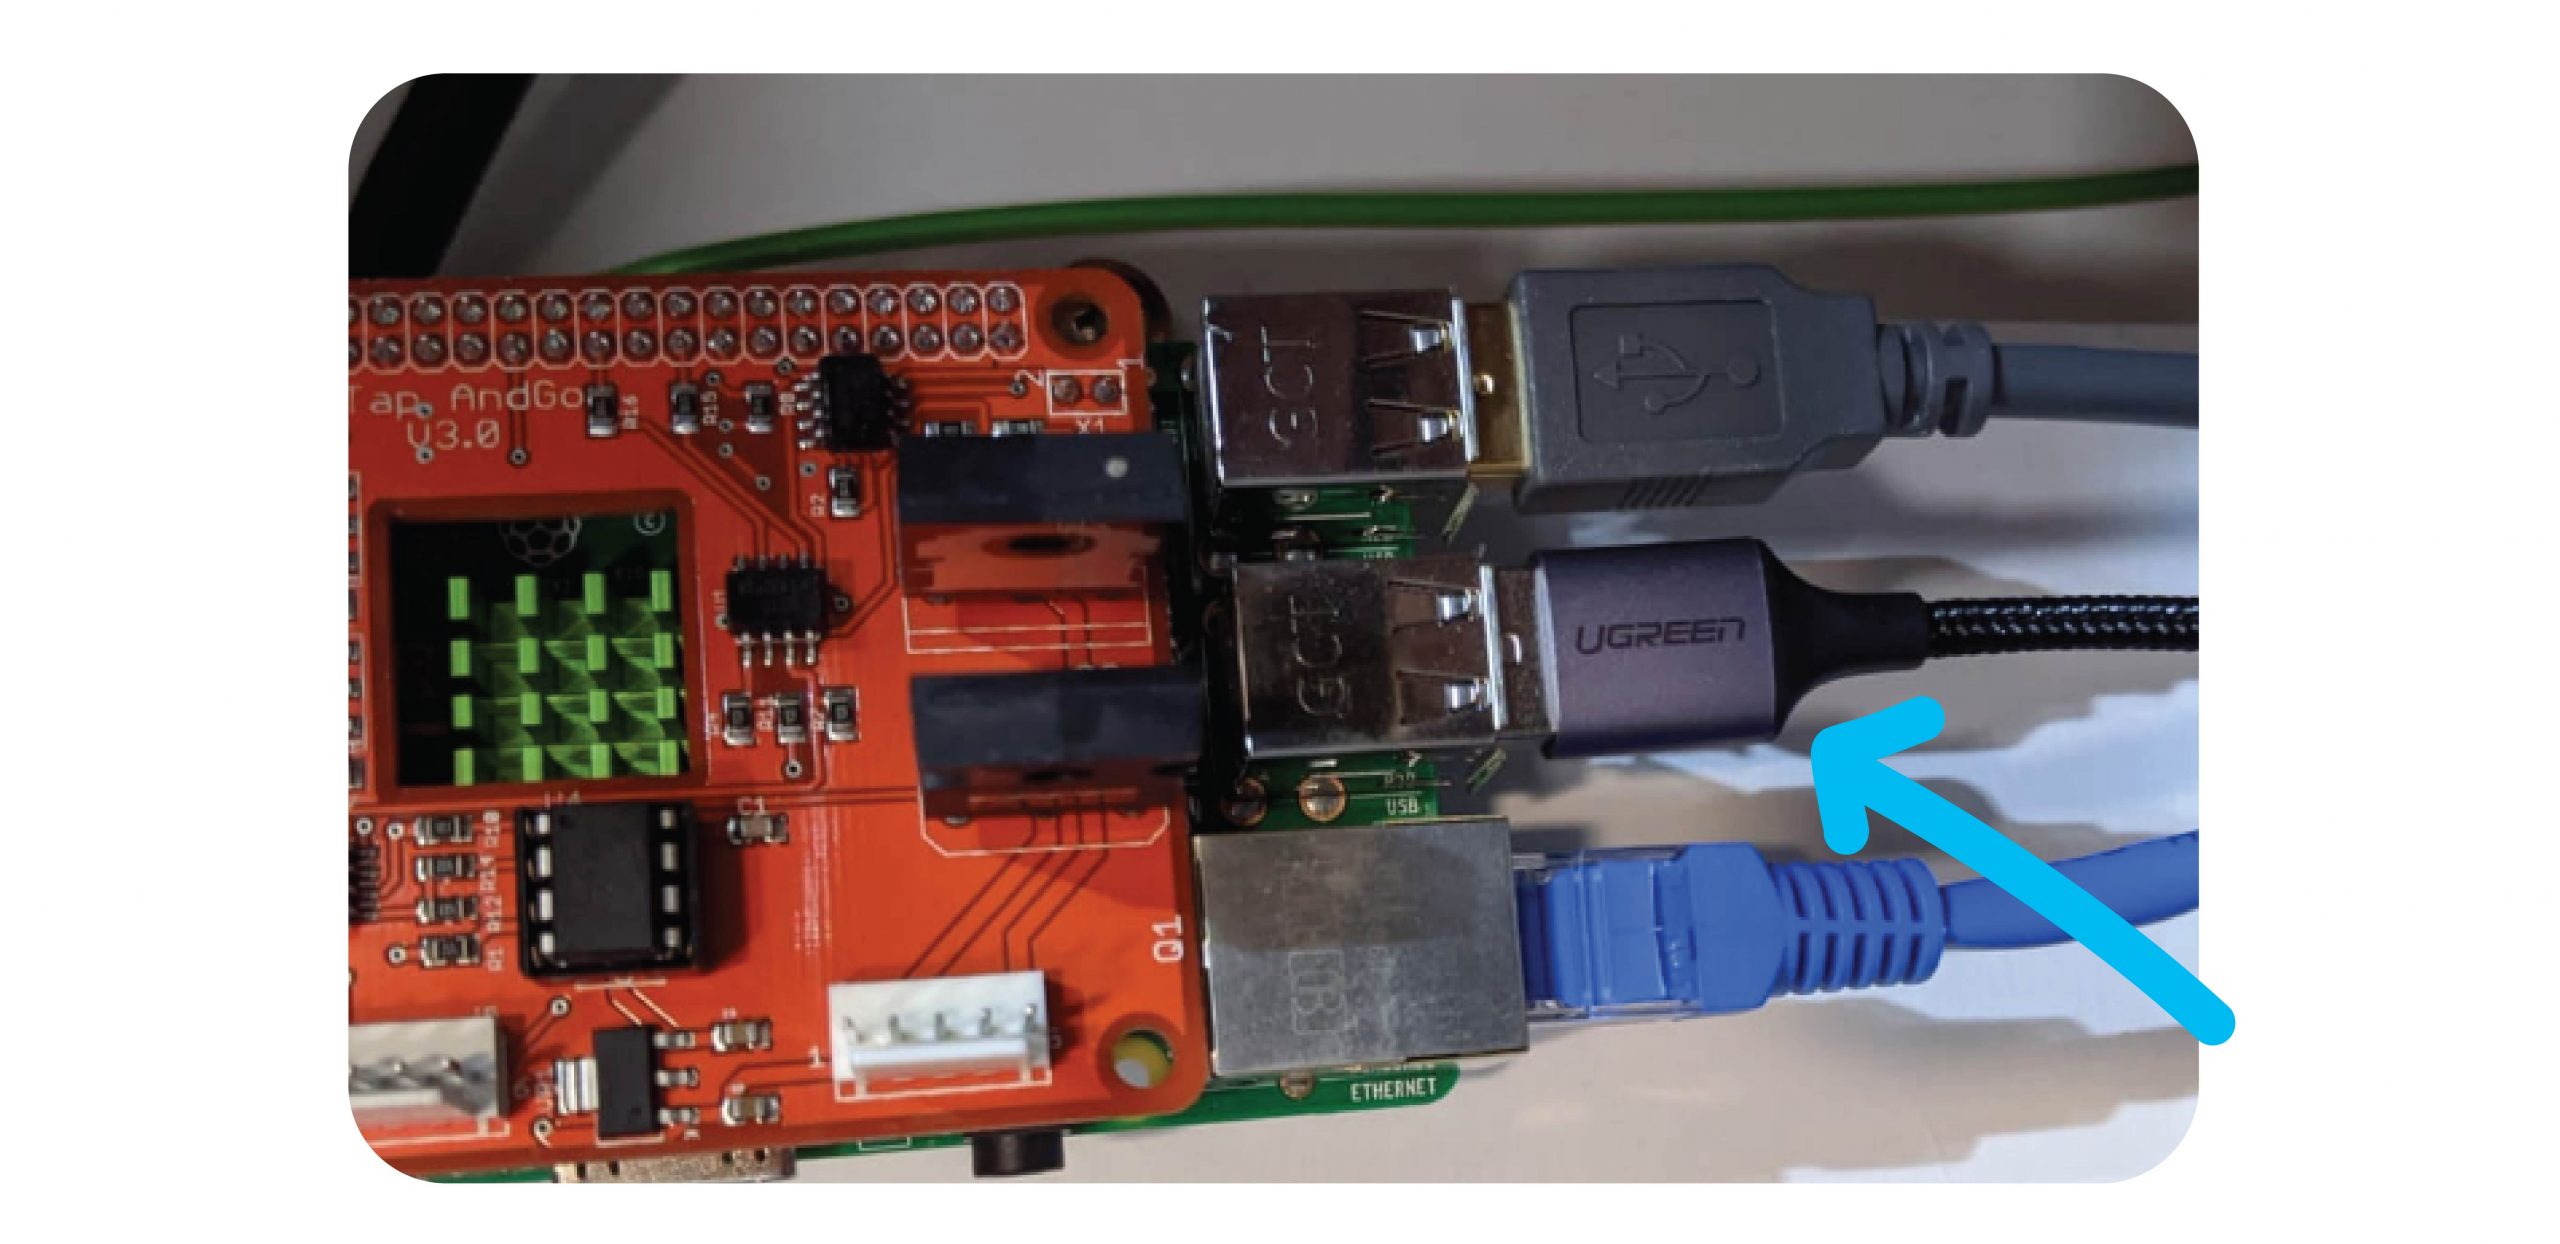
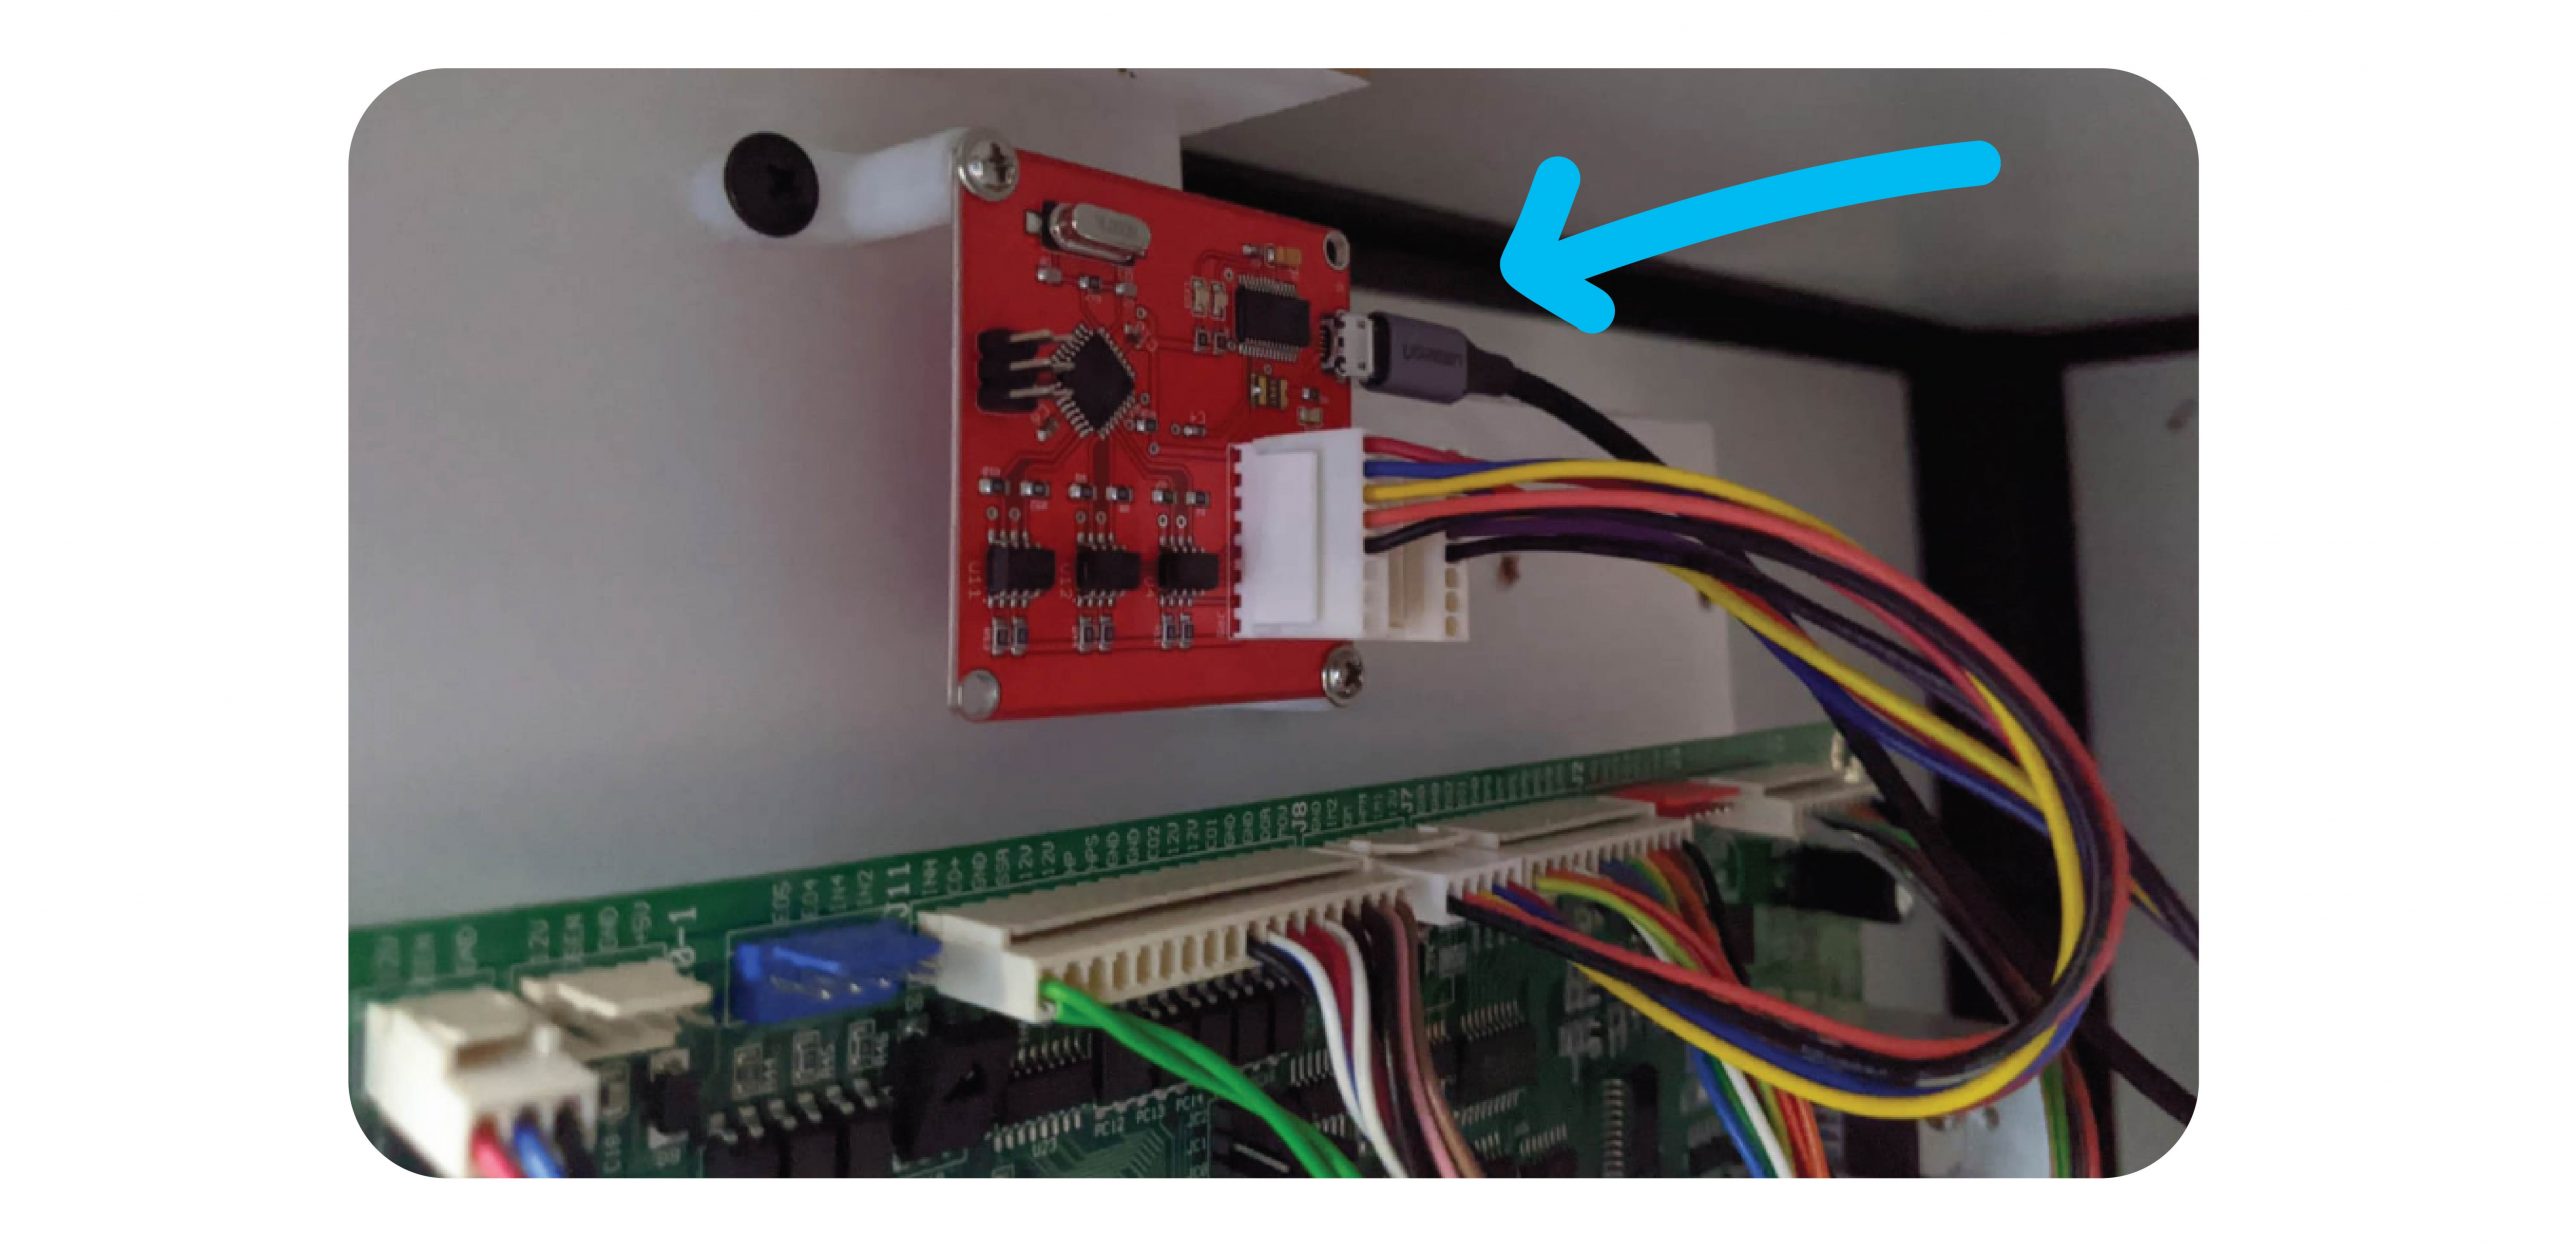
Connect the Micro USB cable between the Raspberry Pi and the Coin & Bill counter.
Step 5: Test
Test coins, notes & 1 x win with money. Make sure all meters tick properly.
Send an email to techsupport@coinopgroup.com to confirm the installation.
For The Claw Large & Standard Machines
Parts Needed:
- 1 x Counter PCB
- 1 x Micro USB Cable
- 1 x Non-LCM Counter PCB to main PCB cable
- 1 x Adapter cable
- 2 x Screws
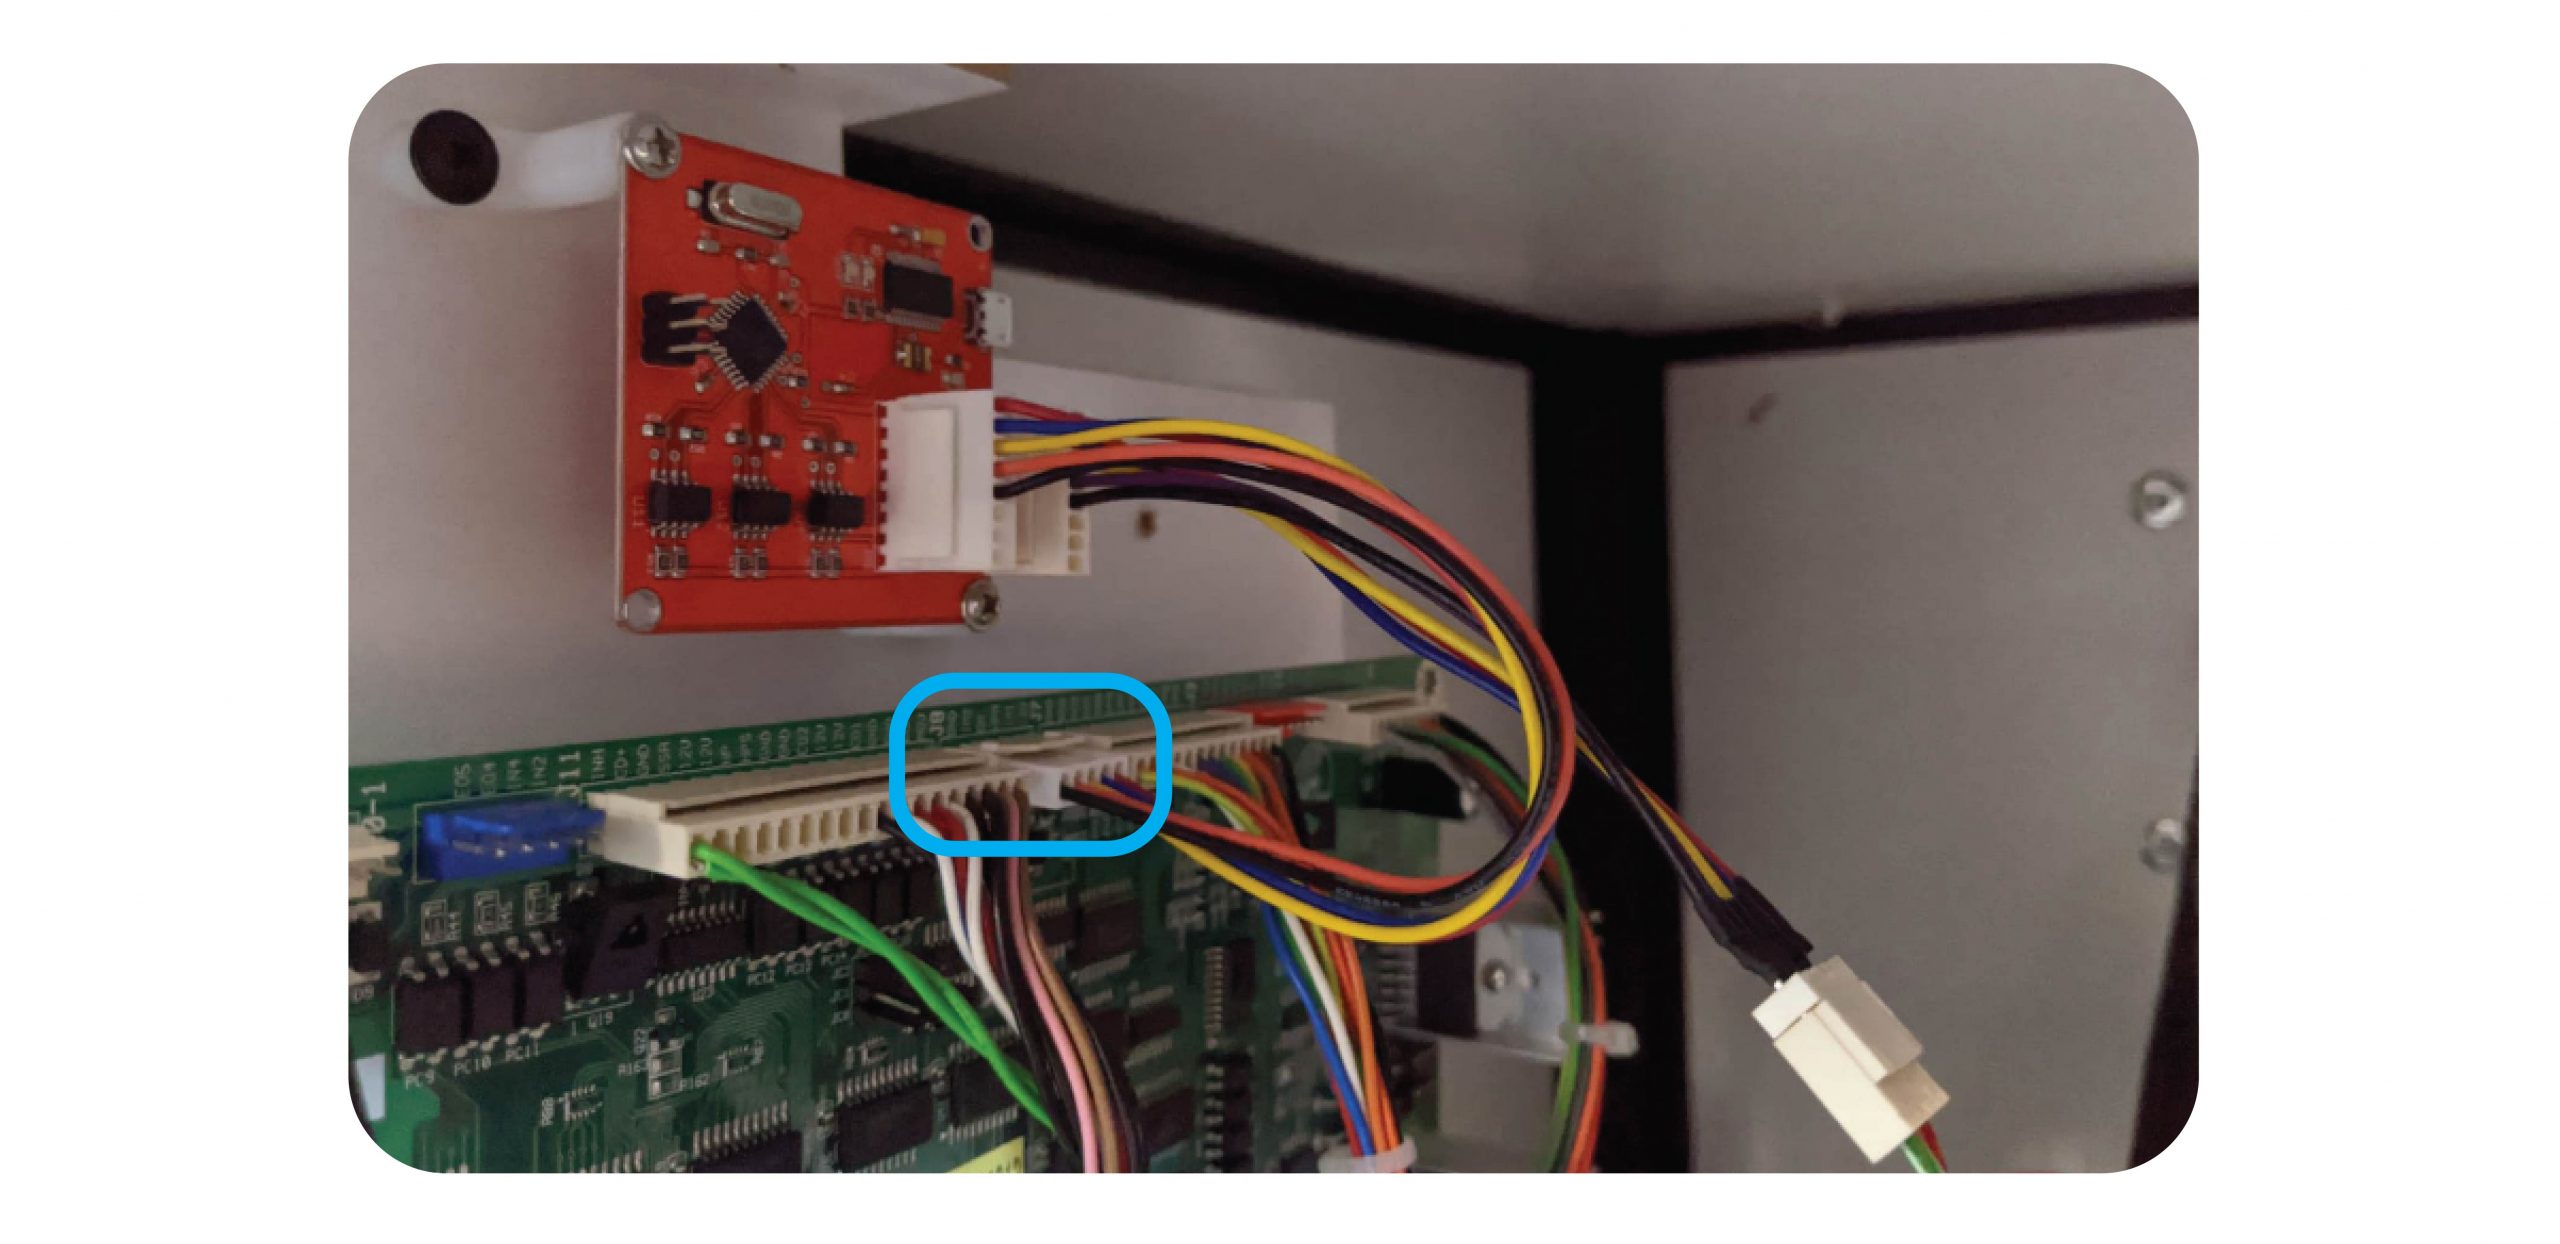
Step 1:
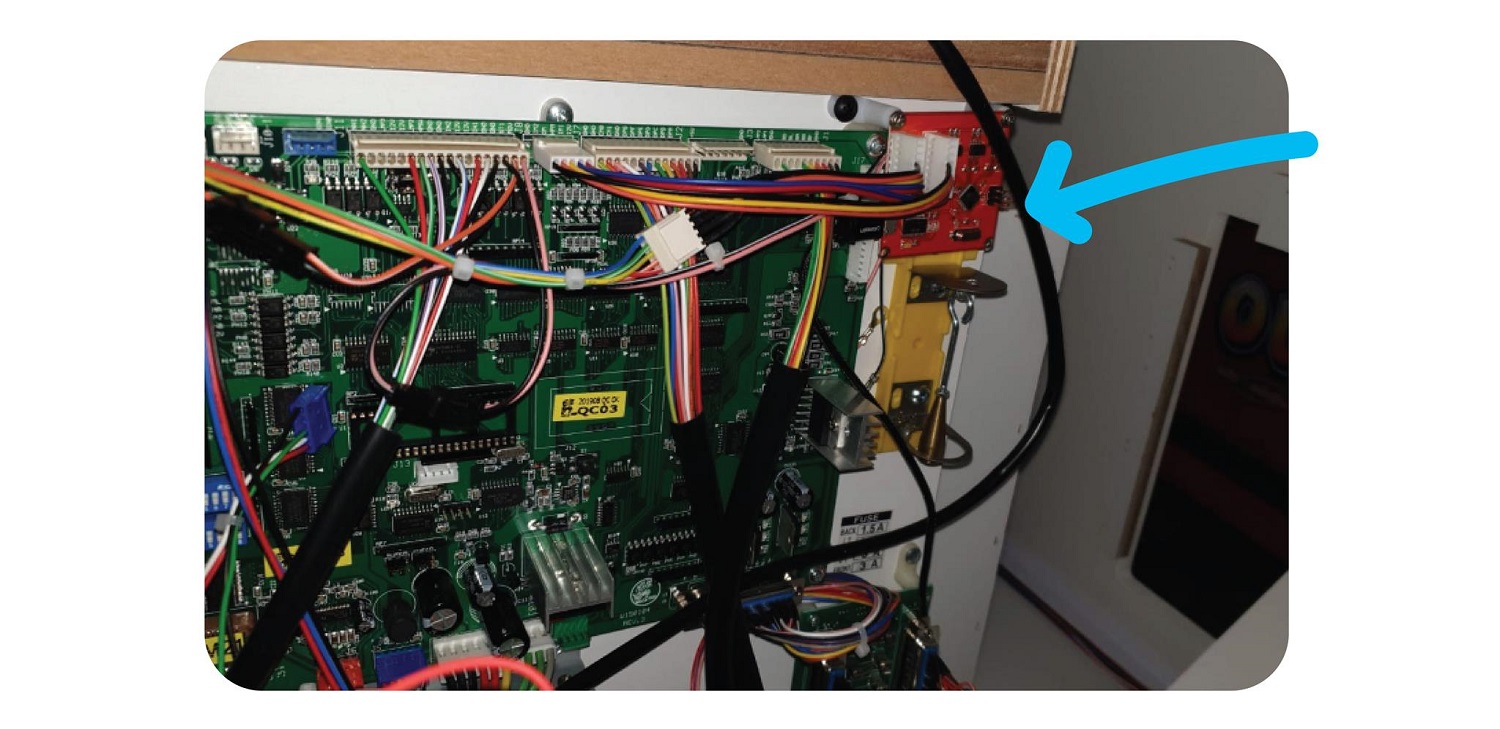
Open up the back / front of the machine and screw the new board onto the sliding board that houses the PCB, above the J8 Port:

For The Claw Large install the counter to the right above the Tilt Sensor:
Step 2:
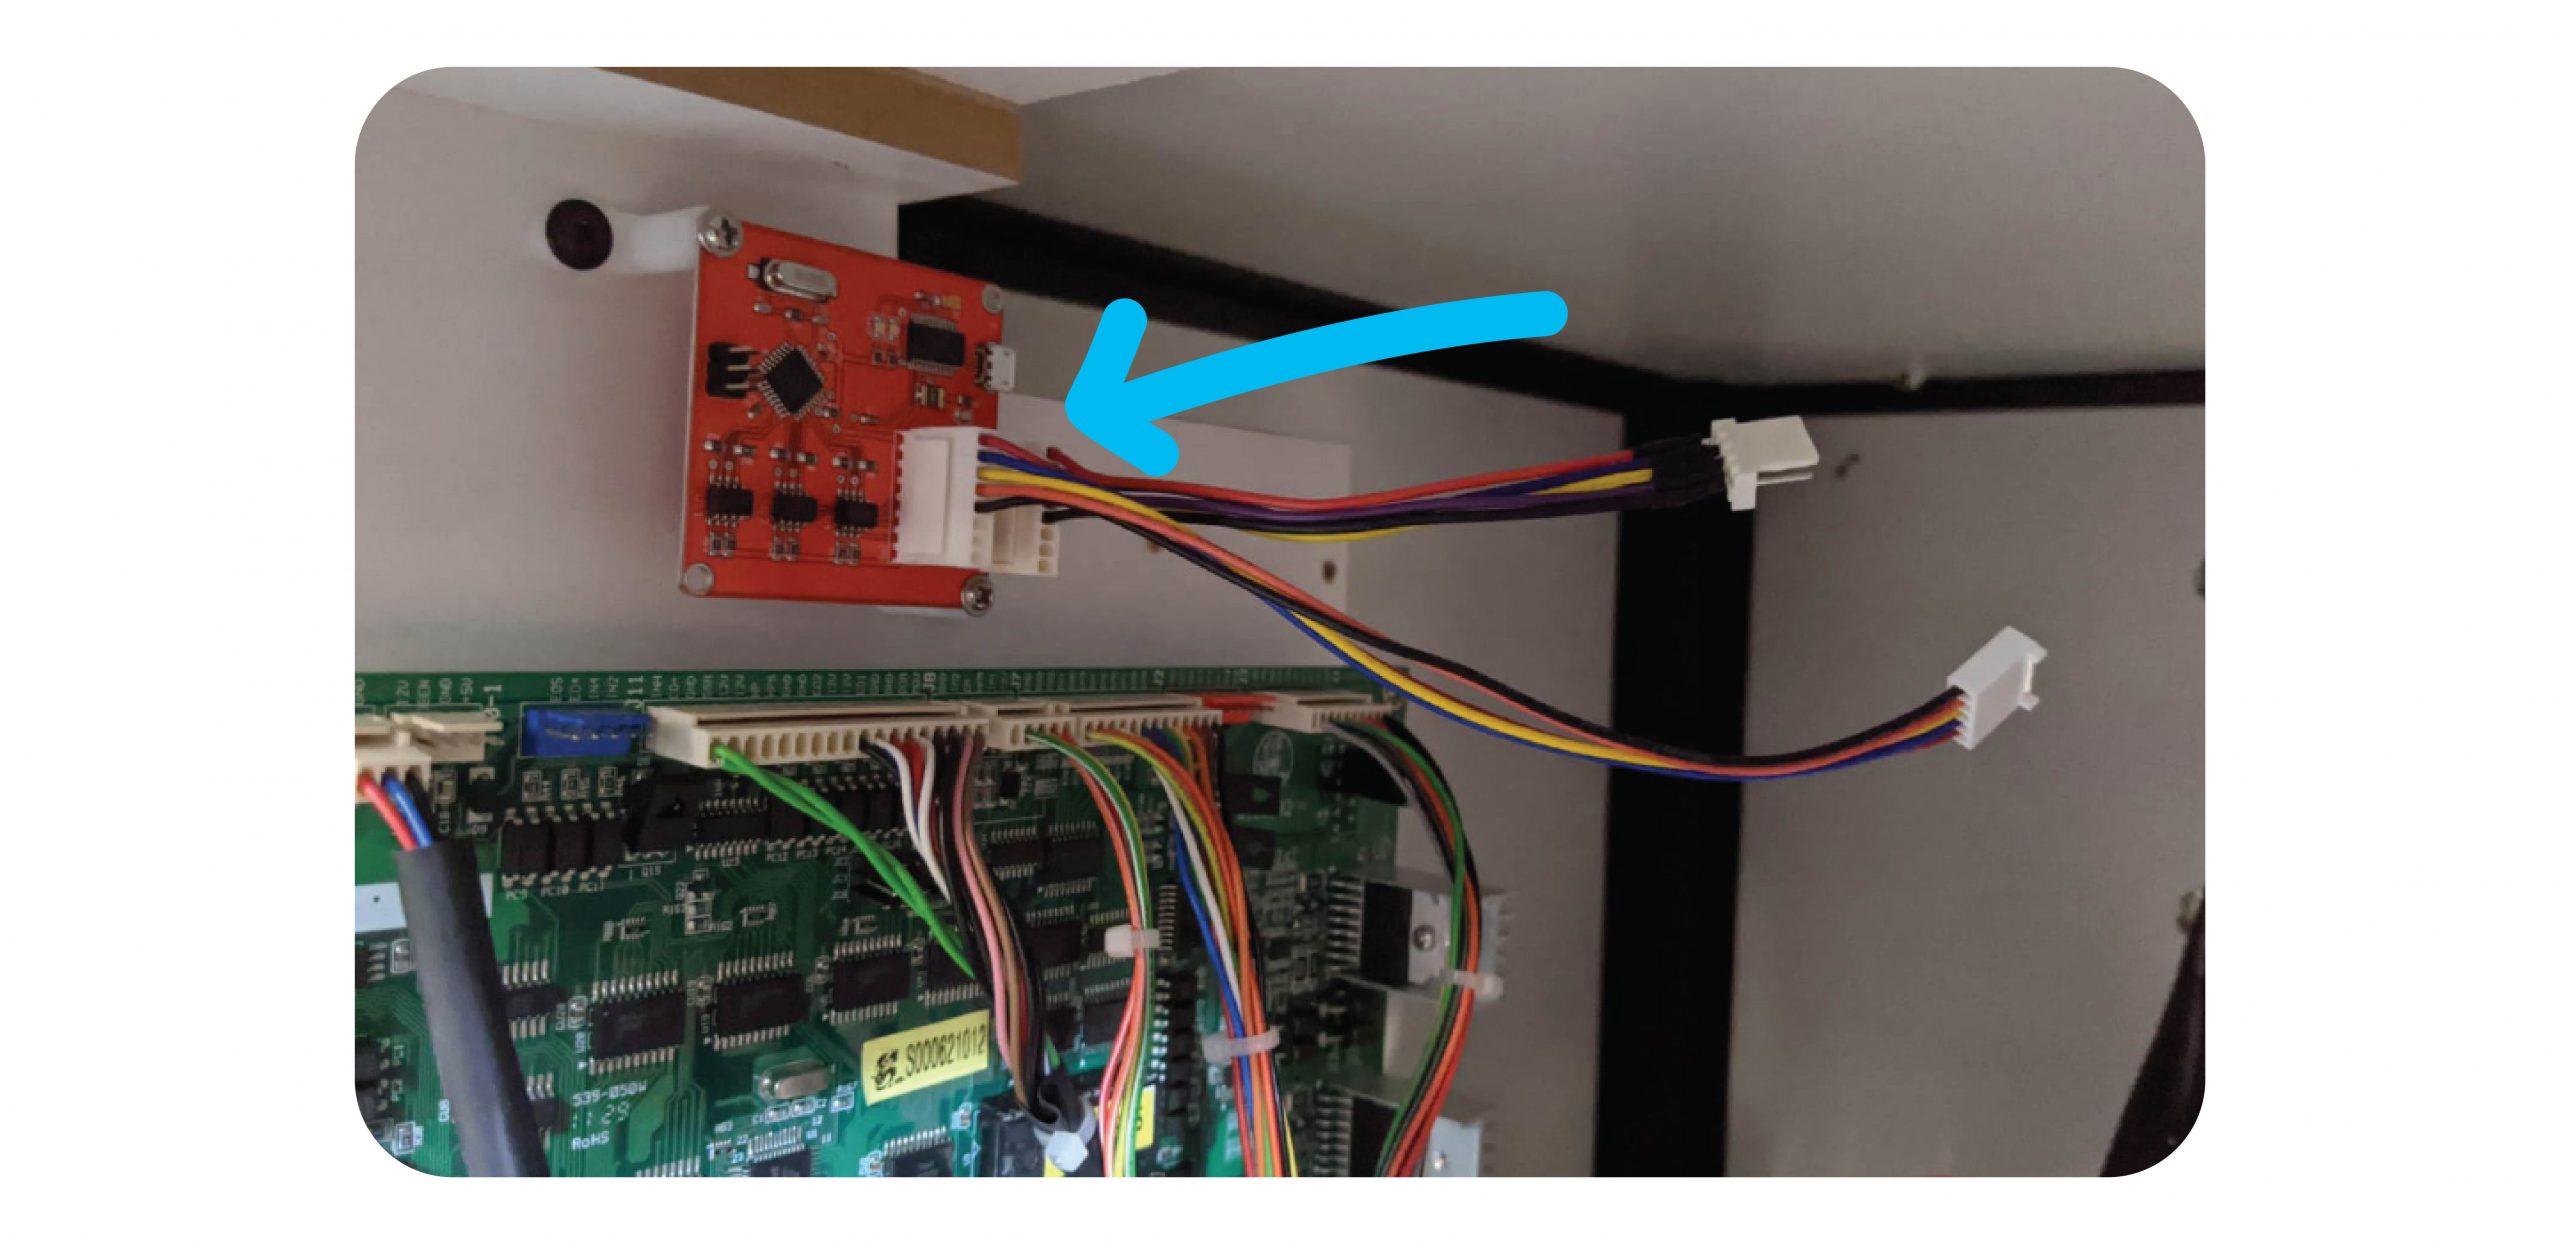
Add the Non-LCM Counter PCB Cable to the Inside port of the Counter PCB, and the adapter wire to the outside port:
Step 3:
Remove the J8 connector and plug this into the adapter wire:
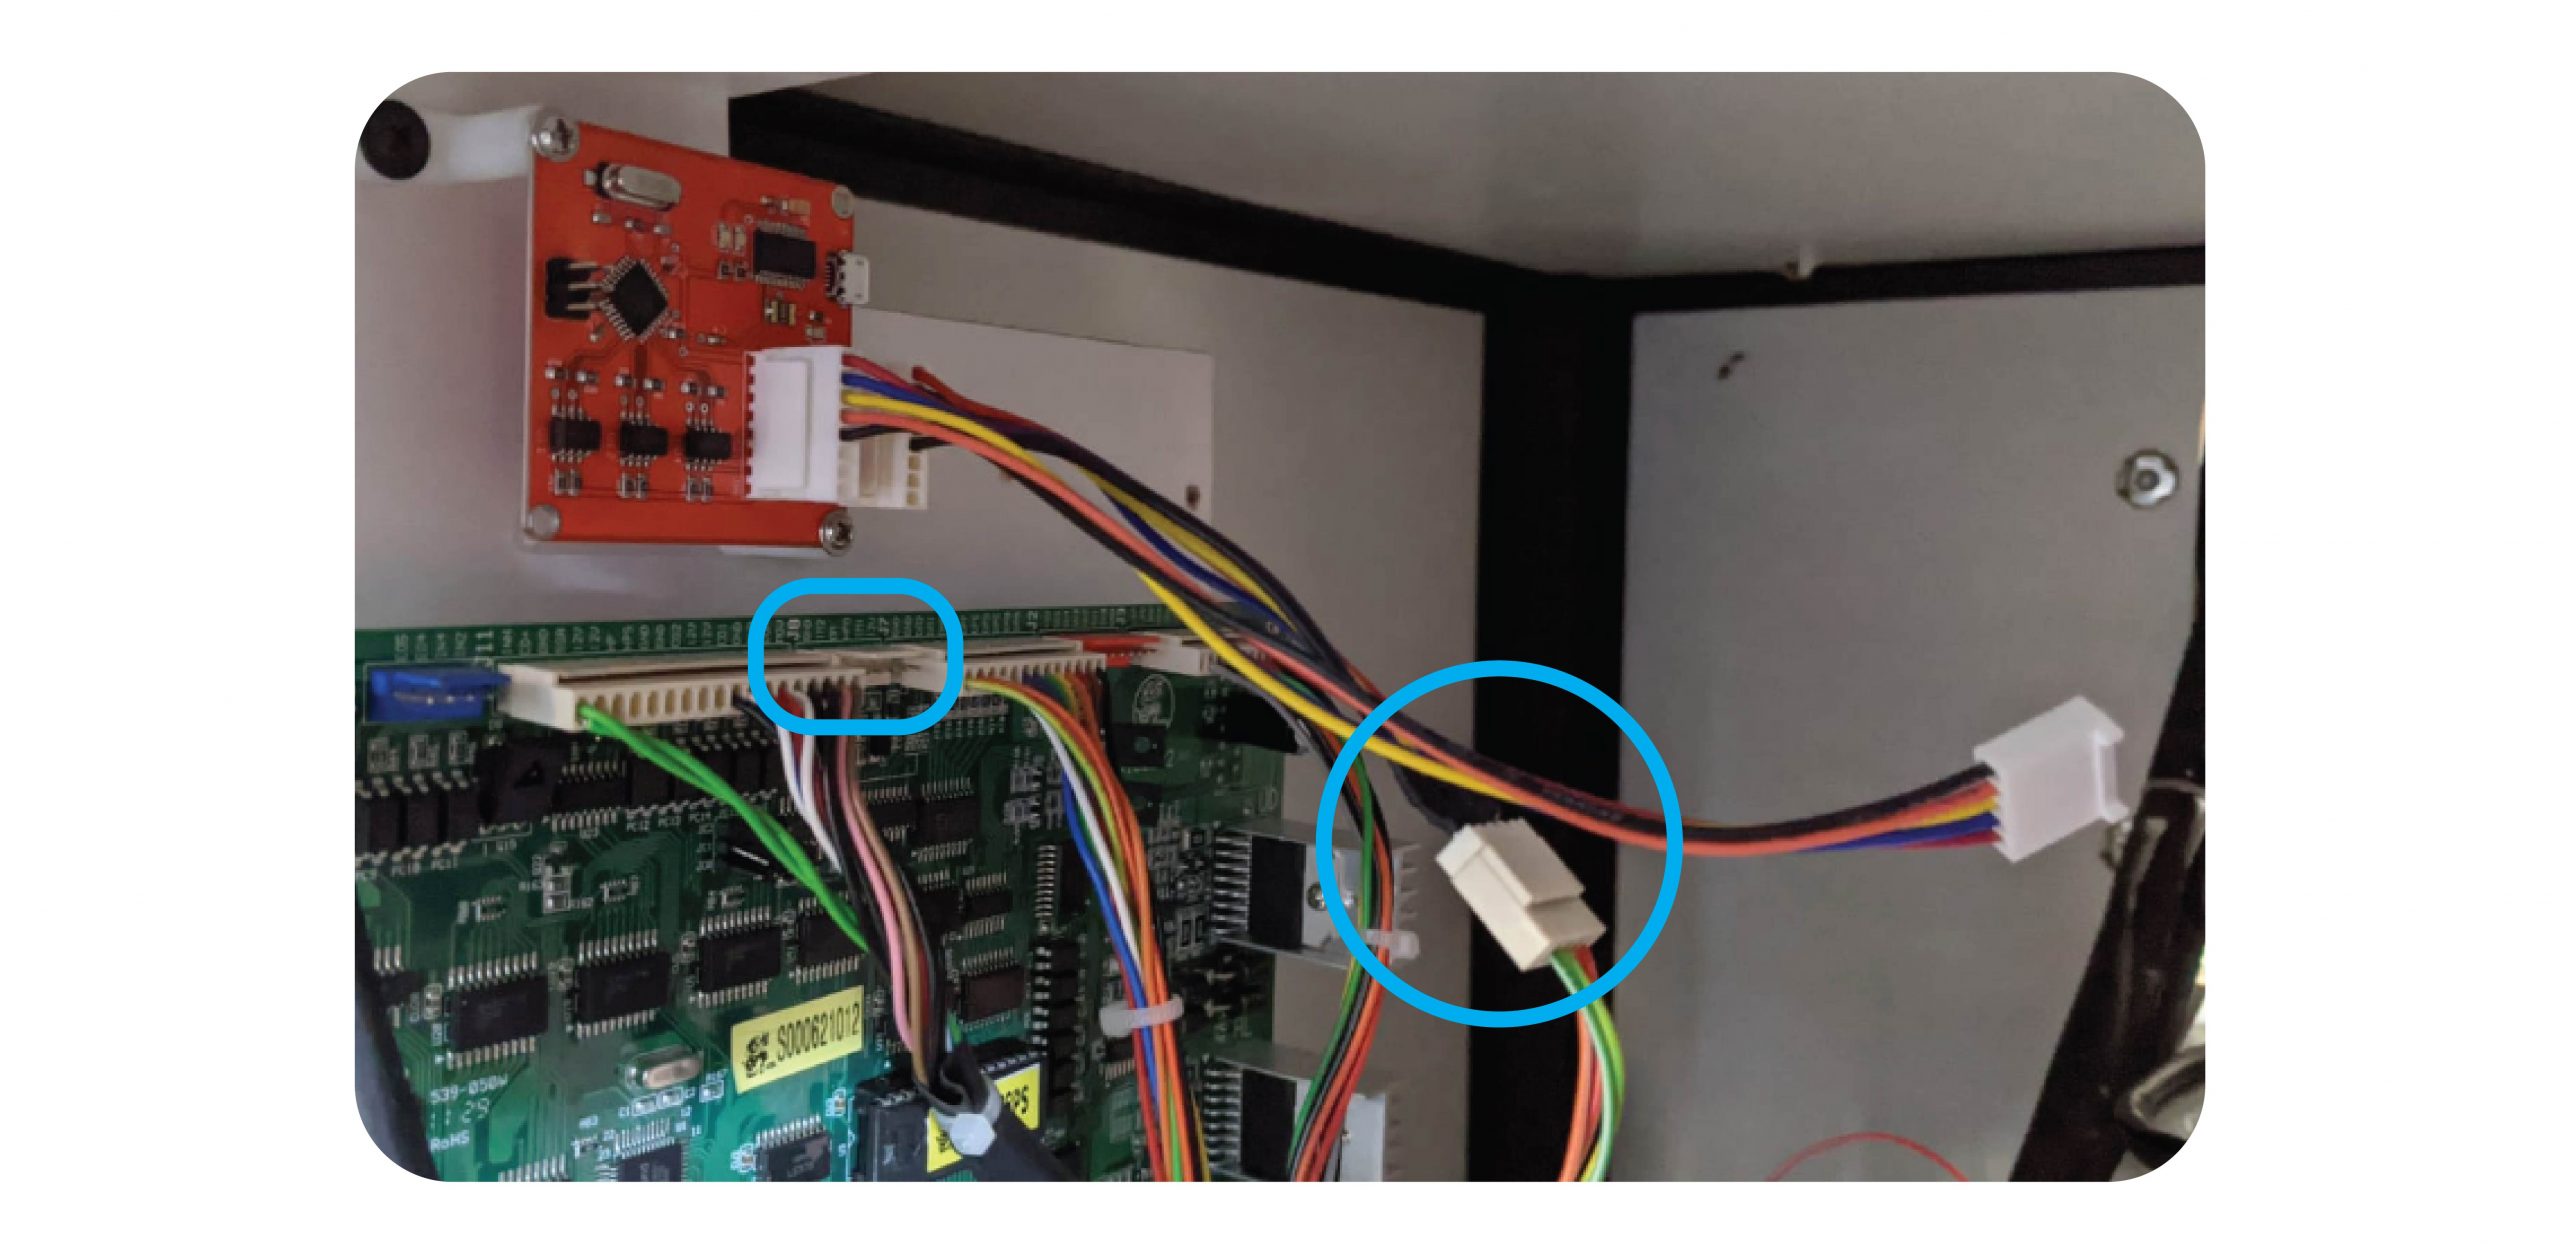
Then connect the PCB to Counter PCB cable to the J8 connector:
Step 4:
Connect the Micro USB cable to the Counter PCB and the Raspberry Pi:
Step 5: Test
Test with coins, notes & 1 x win with money in this order:
- Coins
- Notes
- Win
Make sure all meters tick properly.
ENSURE ALL TEST GOES ARE ENTERED INTO THE SOFTWARE FOR EXAMPLE $5 NOTE AND $1 COIN WILL BE 6
Send an email to techsupport@coinopgroup.com to confirm the installation.
For Iron Claw
For the Iron Claw you will need to remove the PCB guard to access it:

Add the wires as you would with the other machines, and then replace the guard.
Keep the Coin & Bill counter outside of the guard by ensuring the wires go through the intended gap:
Put the guard back and tighten the 4 nuts. Use the last nut to keep the PCB in place by securing the foot in place:
For Maxi Claw
For the Maxi claw, you will need to plug the wires in at the JP5 connector at the left of the board:
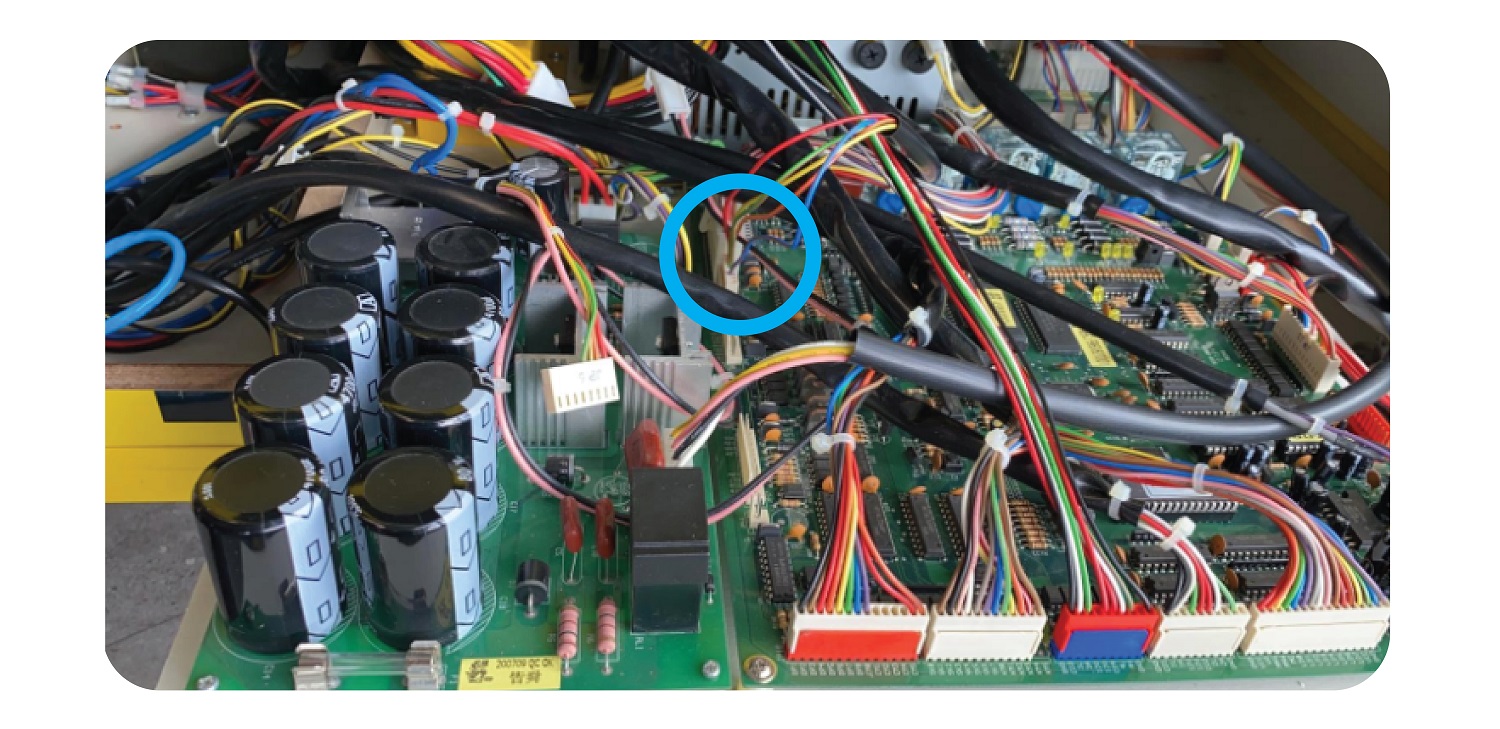
Install the new board in the gap at back left: